Monday, August 29, 2011

miscellaneous: paint stands drawing to a close

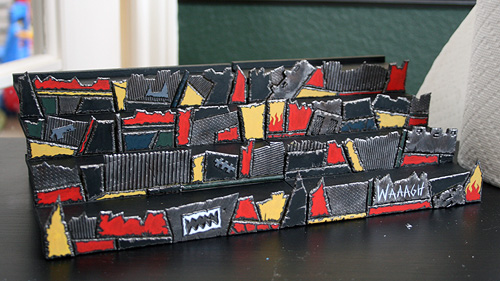
Spent most of this week's hobby time finishing up the Orky paint stand commissioned by a local gamer. While I'm happy to provide the service, I severely underestimated, and undervalued, my time. With 13-14 hours into it when all is said and done, we're looking at about $3.35/hr! Not even half minimum wage! I'm still up to popping these out for folks, but I'm pretty much out of the Ork-style paint stand business unless I either cast the front-plates (downside: each is no longer unique) or I jack the price way, WAY up.

Unlike last update, I shall provide pictures!


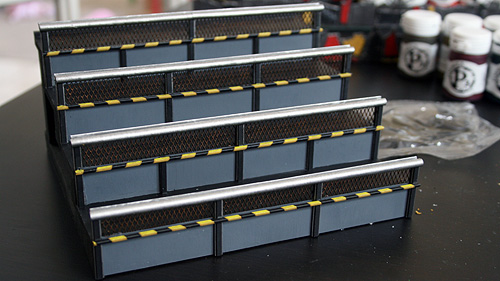
Grandstand

Completed this one a couple weeks ago, but forgot to take pics. It's a bit barren 'cause I didn't have enough of any particular iconographic bits to decorate it up for a distinct army. Thought about stenciling in some numbers between panels, but ran out of steam. The hazard stripes were less to provide visual interest (which they do), than to provide practice for a soon-to-be-blogged project relevant to my interests.


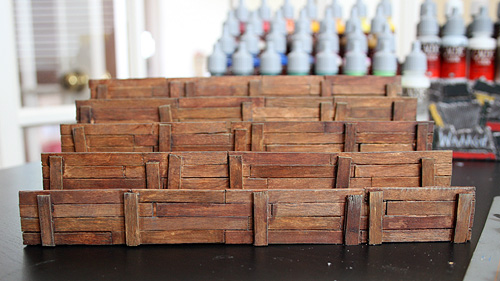
Trenchworks

Did this one 'cause I needed to decorate up the dropper-bottle stand I pioneered in this post. Oddly enough, as I was finishing this one up a friend asked if I could do up a Death Korp of Krieg-themed paint stand for him. I showed him this one as proof of concept and he loved it. His will be a bit more involved (earth showing through the boards, lasguns and battle detritus, etc.) but probably won't be started for at least a couple weeks.


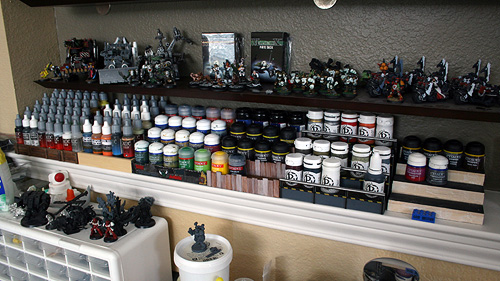
The lot of 'em!

Have a couple undecorated stands in there, but no desire to make 'em look pretty at present. Too inspired by real hobby projects at the moment. I'm sure I'll come back to 'em the next time my hobby batteries need a recharge.


Orky Commission: 90% painted

Just need to add a little freehand to the stand on the left, decorate the Rhino doors in Ultramarines and/or Space Wolves colors, and arrange delivery/payment. It'll have to be this week. Not because the client requested, but because the proceeds are going towards Space Marine on the Xbox 360 next week. Which is where I spent my hobby time Tuesday night/Wednesday morning. I wasn't as enamored with the demo as some of my friends, but I liked it well enough to walk into Best Buy and pre-order it the next day - Emperor's Children and Iron Warrior skins were too good to pass up. You know what they say:

"Iron Within! Naughty Bits Without!"

Thursday, August 18, 2011

miscellaneous: of commissions, funding, and combat patrol

Sorry to not have any pics to post lately. I've picked up a couple extra shifts at work, as well as a couple commissions for paint stands that have been absorbing my hobby time. The good news is that the commissions should help fund my next big project: a 400 point 40K force for Adepticon 2012's Combat Patrol. What that Combat Patrol consists of has yet to be finalized, as I'm in full-on research mode at the moment.

The only 40K-dedicated forum I frequent is The Freebootaz, the "Official Forum of 40K Radio." I joined back in 2009, just as Spencer and Phillip were getting off the ground and found the ass-hattery-less environment of a paid forum much to my liking. Over the years I've come to know and love the guys on the forum, regardless of my shifting feelings towards the Podcast, and look forward to the annual pilgrimage to Chicago to hang out with my "annual best friends from the internet." The Freebootaz have an unofficial thing going where as many of us as possible will be crafting Combat Patrol armies, with special kudos to those theming their armies for the Badab War. For that purpose, I've been researching the Minotaurs and Carcharodons Space Marine chapters. I like the former because they're less popular, have a wealth of Greek iconography to pull from, and have a distinct distaste for the Ultramarine gene-seed. I like the latter because I have some assembled models that would fit their aesthetic nicely, saving me both time and money. Unfortunately, neither chapter's fluff is compelling enough to give either faction an edge. There's also a third contender waiting in the wings...

The third contender is, of course, the Iron Warriors. I say "of course" because I've had them percolating in the brain-stew since doing the graphic design work for the Iron Warriors Minidex that "Axinous" released earlier this year. At Adepticon 2011 they were fresh on the brain and I managed to pick up some Mk.III Iron Armour, Phobos pattern bolters and an Iron Warriors Dreadnought from the ForgeWorld booth. Theoretically, this would be the cheapest army to implement at this time, as I have most of the components already on hand. Unfortunately, it's damn tough to come up with a 400 point Combat Patrol list using Codex: Chaos Space Marines. Their basic troops are too expensive, and their most effective and/or most thematic units don't meet the rules of Combat Patrol (2+ saves, front armour 14, etc.). Despite all this, and as much as I want to join in the Badab shenanigans, the Iron Warriors are the army I've been giving the most thought to of late.

As with the Dystopian Wars stuff of the past couple months, I plan to update in earnest with whatever power armoured force(s) I decide to assemble. I'll also put up some pics of a couple more finished paint stands as I finish the commissions mentioned earlier in the thread. Turns out I severely misestimated my time and their getting the labour dirt cheap. Live and learn, I suppose.

Wednesday, August 3, 2011

build: sea table: take 2, part 2

Almost a month ago I restarted my sea table, after screwing it up on the first go 'round. While I initially took "a couple days off" to stew over whether I liked the paint job, my nervousness about screwing it up again made it easy to be distracted with other hobby projects. This past weekend I took the opportunity during the kid's nap time to bite the bullet, mix up a small batch of glass coat and finish one of the three boards. Part of this was due to necessity, no telling how long the kids will nap from day-to-day, and partly due to economy, if I screwed it up again, I'd have only wasted one 2' x 4' board. I'm happy to report that it worked well enough for me to spend today's nap time coating up a second board and document the process as I went along.
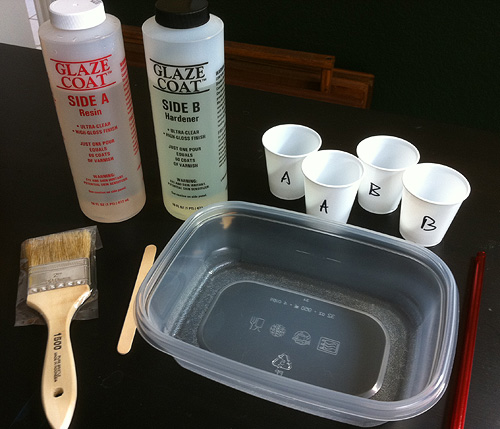

Step 1: gather supplies

L-to-R: Cheap, throw-away brush. Glass coat. Popsicle stick. Shallow, see-through container. Four 3 oz. cups. Straw.
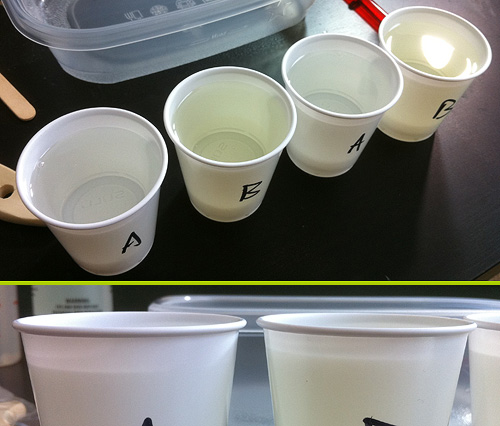

Step 2: pour glass coat

The glass coat is labelled "Side A" and "Side B" so I've labelled the cups accordingly and filled two cups of each part. Because of the hobby fail with the last table, I filled the "B" cups 2-3 millimeters higher than the corresponding "A" cup. I'm pretty sure you can follow the package directions and go even-stevens as long as you mix thoroughly.
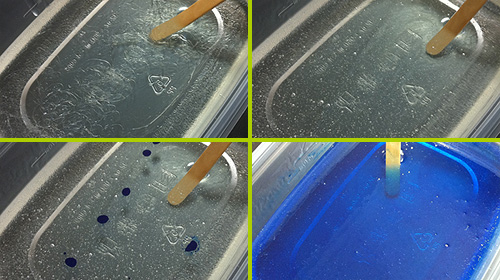

Step 3: make water

  • Top left: Pour the contents of each cup into your mixing container. Again, because of the hobby fail last time, I chose to use a shallow, see-through container this go 'round to so I could have visual confirmation that the two parts mixed thoroughly.
  • Top right: Using your popsicle stick, mix thoroughly. I went through for a good two minutes mixing the parts. As you start you'll see milky, silvery strands where the two parts are mixing. Eventually, the color will even out through most of the mix and, depending on how vigorously you stirred, you'll have a multitude of bubbles. In this regard, the slower you stir the better.
  • Bottom left: Add 7 drops of blue ink.
  • Bottom right: Again, mix thoroughly until the color is mostly even throughout the mix. After this step, I gently agitate the container to bring the bigger bubbles to the surface and then slowly exhale over them. This breaks the bubbles readily, while fanned air does not. I've read that it has something to do with an exhalation's higher quantities of carbon dioxide.
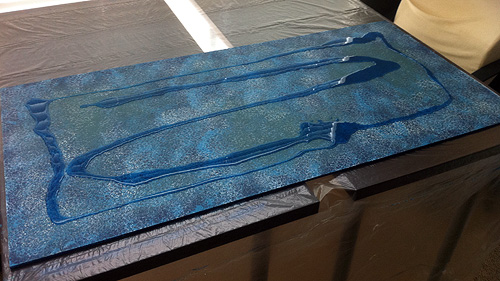

Step 4: pour!

Dump your glass coat mixture over your board. I try to spread it as far as possible now so that it's easier to spread out by brush in the next step. As far as I've found, there's no good way to rinse out hardening resin, so go ahead and throw away your mixing container. It's useless to you now.
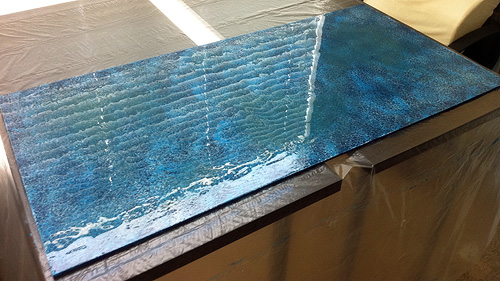

Step 5: spread!

Using your cheap brush, spread the glass coat mix over your board making sure that every inch has some glass coat on it. Go for a relatively even coat across the board, but don't sweat it if it's a little thicker in some areas than others. If you've got some latex gloves handy, go ahead and don them now. Cheap brushes like to leave a few bristles on the board and you may need to go fishing them out. Like the mixing container, your cheap brush is now useless. Chuck it.
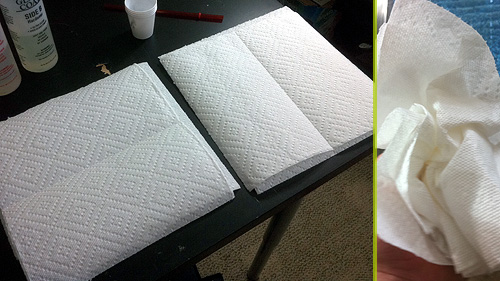

Step 6: prep your towels

The one supply I forgot to put in the group shot - paper towels. You'll use several with each board. I go ahead and make 'em double-layered (left) before I scrunch 'em (right), and find it more efficient to blot double-fisted. Your mileage may vary.
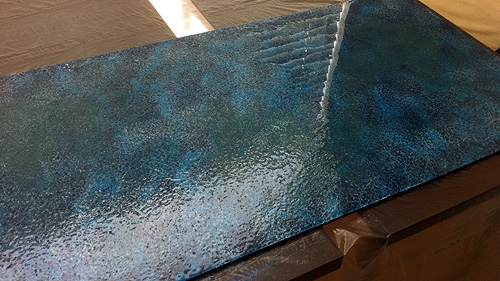

Step 7: blot!

Methodically blot the surface of your board. I alternate hands and rotate as I go just to make sure no patterns appear in the surface. The above pic was taken halfway through the process. The reflection of the blinds shows where I stopped to take the picture.

Step 8: blow bubbles

Unfortunately, the pics for this step didn't turn out at all. I'm afraid you'll have to rely solely on my description. Using your straw, methodically blow over the surface of the board. As you pass over them, it's kinda fun to watch 'em pop.
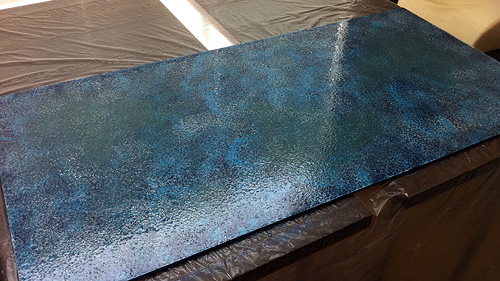

Step 9: re-blot!
Step 10: re-blow!

I find that one blot pass leaves too smooth a surface for my liking, so I repeat the process of blot and blow across the entire board. By this time, the resin has started to stiffen and has even less elasticity to pull itself back into larger blobs.

That's it! There's nothing left to do but let the glass coat cure 'till it's solid. I believe the instructions say 72 hours for a complete cure, but check your instructions to be sure. If you've got the time and space, there's no reason you couldn't do a complete 4' x 6' board in 2-3 hours.