Almost a month ago I restarted my sea table, after screwing it up on the first go 'round. While I initially took "a couple days off" to stew over whether I liked the paint job, my nervousness about screwing it up again made it easy to be distracted with other hobby projects. This past weekend I took the opportunity during the kid's nap time to bite the bullet, mix up a small batch of glass coat and finish one of the three boards. Part of this was due to necessity, no telling how long the kids will nap from day-to-day, and partly due to economy, if I screwed it up again, I'd have only wasted one 2' x 4' board. I'm happy to report that it worked well enough for me to spend today's nap time coating up a second board and document the process as I went along.
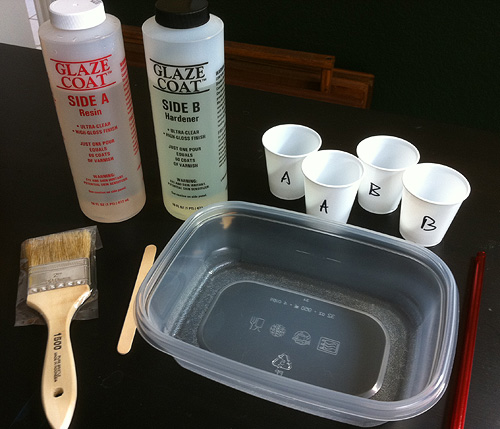
Step 1: gather supplies
L-to-R: Cheap, throw-away brush. Glass coat. Popsicle stick. Shallow, see-through container. Four 3 oz. cups. Straw.
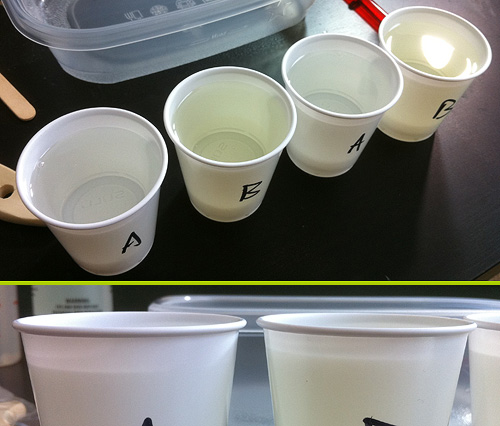
Step 2: pour glass coat
The glass coat is labelled "Side A" and "Side B" so I've labelled the cups accordingly and filled two cups of each part. Because of the hobby fail with the last table, I filled the "B" cups 2-3 millimeters higher than the corresponding "A" cup. I'm pretty sure you can follow the package directions and go even-stevens as long as you mix thoroughly.
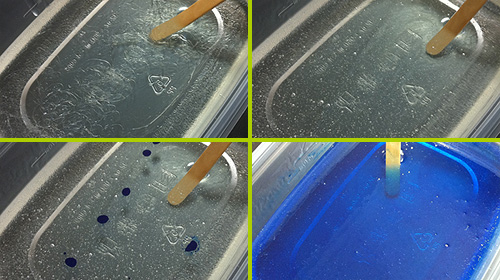
Step 3: make water
- Top left: Pour the contents of each cup into your mixing container. Again, because of the hobby fail last time, I chose to use a shallow, see-through container this go 'round to so I could have visual confirmation that the two parts mixed thoroughly.
- Top right: Using your popsicle stick, mix thoroughly. I went through for a good two minutes mixing the parts. As you start you'll see milky, silvery strands where the two parts are mixing. Eventually, the color will even out through most of the mix and, depending on how vigorously you stirred, you'll have a multitude of bubbles. In this regard, the slower you stir the better.
- Bottom left: Add 7 drops of blue ink.
- Bottom right: Again, mix thoroughly until the color is mostly even throughout the mix. After this step, I gently agitate the container to bring the bigger bubbles to the surface and then slowly exhale over them. This breaks the bubbles readily, while fanned air does not. I've read that it has something to do with an exhalation's higher quantities of carbon dioxide.
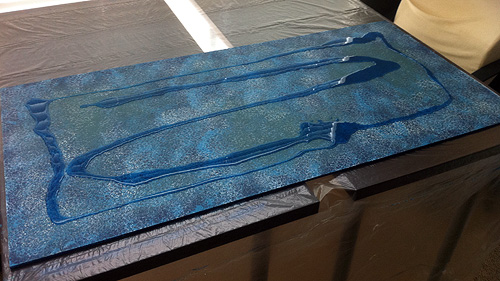
Step 4: pour!
Dump your glass coat mixture over your board. I try to spread it as far as possible now so that it's easier to spread out by brush in the next step. As far as I've found, there's no good way to rinse out hardening resin, so go ahead and throw away your mixing container. It's useless to you now.
Step 5: spread!
Using your cheap brush, spread the glass coat mix over your board making sure that every inch has some glass coat on it. Go for a relatively even coat across the board, but don't sweat it if it's a little thicker in some areas than others. If you've got some latex gloves handy, go ahead and don them now. Cheap brushes like to leave a few bristles on the board and you may need to go fishing them out. Like the mixing container, your cheap brush is now useless. Chuck it.
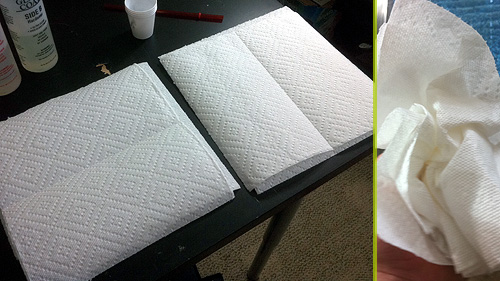
Step 6: prep your towels
The one supply I forgot to put in the group shot - paper towels. You'll use several with each board. I go ahead and make 'em double-layered (left) before I scrunch 'em (right), and find it more efficient to blot double-fisted. Your mileage may vary.
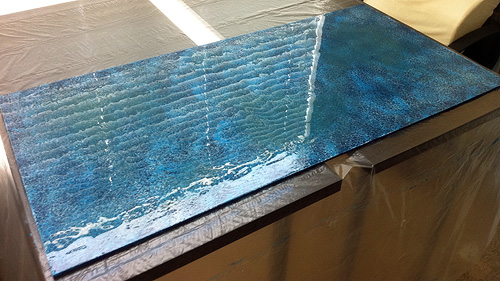
Step 7: blot!
Methodically blot the surface of your board. I alternate hands and rotate as I go just to make sure no patterns appear in the surface. The above pic was taken halfway through the process. The reflection of the blinds shows where I stopped to take the picture.
Step 8: blow bubbles
Unfortunately, the pics for this step didn't turn out at all. I'm afraid you'll have to rely solely on my description. Using your straw, methodically blow over the surface of the board. As you pass over them, it's kinda fun to watch 'em pop.
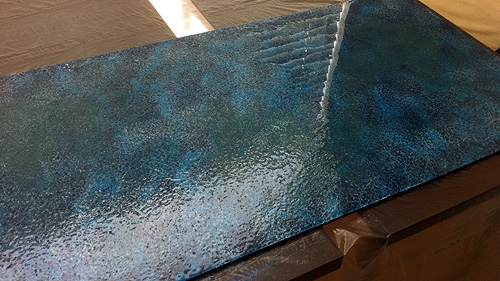
Step 9: re-blot!
Step 10: re-blow!
I find that one blot pass leaves too smooth a surface for my liking, so I repeat the process of blot and blow across the entire board. By this time, the resin has started to stiffen and has even less elasticity to pull itself back into larger blobs.
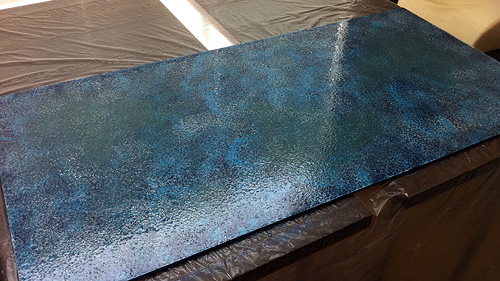
That's it! There's nothing left to do but let the glass coat cure 'till it's solid. I believe the instructions say 72 hours for a complete cure, but check your instructions to be sure. If you've got the time and space, there's no reason you couldn't do a complete 4' x 6' board in 2-3 hours.
Dude your tables and painting are madly inspiring! Keep up the great work! I wish this game was played at my local store, again fantastic!
ReplyDeleteOutstanding write-up and pictures. This really helped me finish mine, which is curing as we speak.
ReplyDeleteThanks again for taking the time to post this.
James
Thank you both.
ReplyDeleteGlad I could be of help, James. Feel free to toss back any wisdom you gained making your own. I'm far from an expert, and anything that makes things easier, cheaper or more efficient has my ears. Or eyes, as the case may be.