Sunday, February 19, 2012

build: work-in-progress: iron warriors, pt. 10

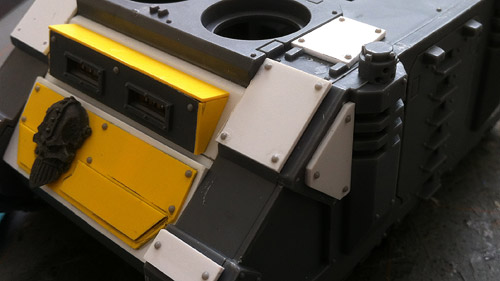
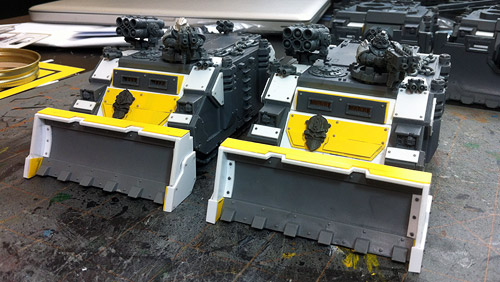
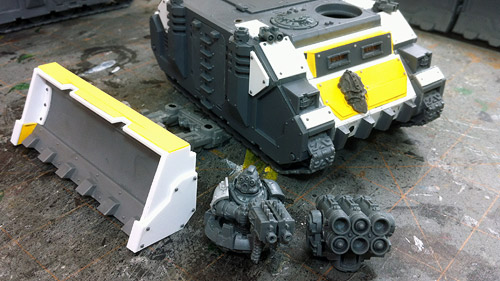
It's been a couple months, but I've finally gotten around to building the third and final Rhino for my 2000 point list. Because it's the dedicated transport for the second of two Breaching Squads, it's virtually identical to the first.


Chelonian III & Scutum IX: Chaos Rhinos: dozer blade, havoc launcher
(clickable)

Like Chelonian before it, Scutum is magnetized for in-game use and ease of painting.


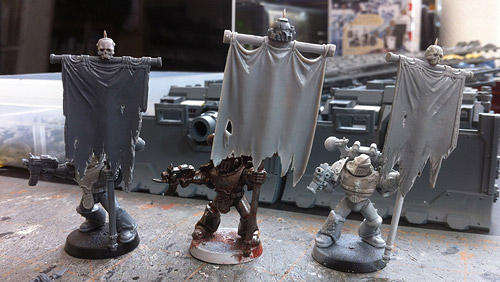
I also spent some time this morning figuring out my banner situation. After playing with several banners I had around the house and test-fitting a few from bits sellers, I settled on using a large, raggedy, WFB Orc banner for my trench-line "command squad" and hacking up the smaller, Space Marine Command Squad banners in a similar fashion for the subordinate squads. The top of the Astartes banners ended abruptly, so I topped 'em off with skulls. Unfortunately, this made the skull atop the Orc banner look plain, so I hacked it off and added a scarred helmet that's likely to be a bright, shining yellow when I paint it.


(clickable)

Next up: Two Chaos Vindicators. I've already got the hull assembly completed and have modified the driver's windows. Everything else is just fiddly detail work to make it look Iron Warriors-y.

Monday, February 13, 2012

paint: iron warriors: breaching squad ferrugo

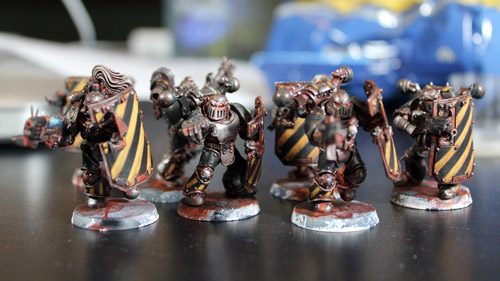
Finished my second unit... (all images clickable to biggie-size)


Breaching Squad Ferrugo:
plague marines, plasma, flamer; champ w/ fist

I streamlined the sequence a bit (same colors, just re-ordered some steps so I'm not going back to the same pots) and kept a stopwatch running while I painted - took about 12 hours to do the squad. A little math averages me an hour-and-a-half to an hour-and-forty-five per figure, depending on the type of squad.


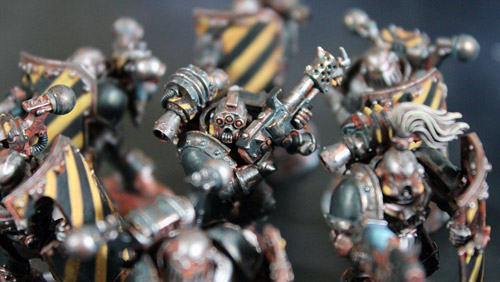
Both of the "Breaching Squads" in my list are technically Plague Marines, and while I think the shields help denote the Toughness increase and Feel No Pain well enough for most folk, I thought I'd amp up the rust and patina to give 'em a metallic "decay" look, just to help drive the point home. It's not quite as pronounced as I thought it would be, but I'm happy with it.

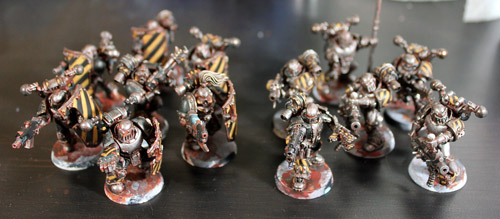
While I had the wife's camera to snap nicer pics than last time, I brought the Zigouilliers back out to help see the difference...


Breaching Squad Ferrugo & Ahnighito's Zigouilliers:
Plague Marines & Chaos Havocs, respectively

I plan to take the rest of the month off from painting to work on building/converting the last Rhino, both Vindicators, and the Dreads. I'll also be working on some custom Iron Warrior Rhino doors/front plates for The Freebootaz annual Toys for Tots army. In March it'll be back to the painting table with... whatever vehicle or unit gets me a fully-painted Combat Patrol for Adepticon in April.

Friday, February 10, 2012

paint: iron warriors: recipe

While painting up the Zigouilliers, I used my cell phone, a pencil and scrap of white paper to keep visual notes of what paints I used where. I plan to use these notes as my recipe for the rest of the army, with slight variations depending on troop type or squad. There's some short-hand in the pics, the key of which is here:
  • gtts: medical abbreviation for drops
  • H2O + FI: a 10:1 mix of distilled water and Liquitex Flow Improver
  • ETOH: 70% alcohol obtained from the drug store
  • zenithal: applied from above, as if coming down from a spotlight directly overhead

All models are primed white, and any non-stippled, non-wash colors were applied using a home-made wet palette.
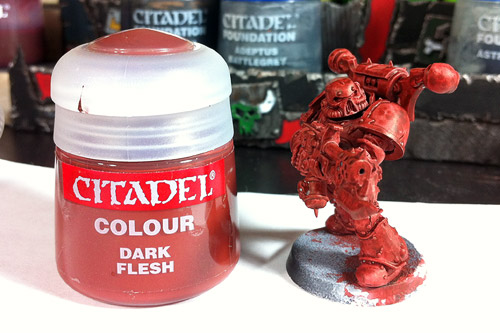

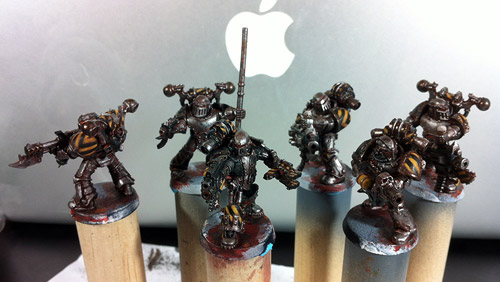
Step 1: complete coverage
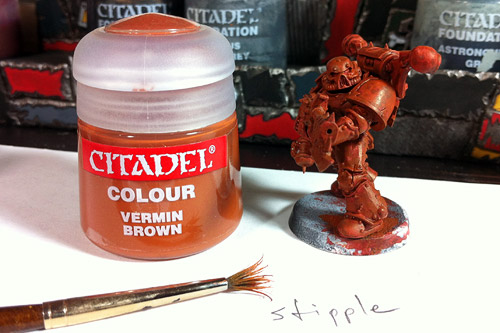

Step 2: moderate coverage
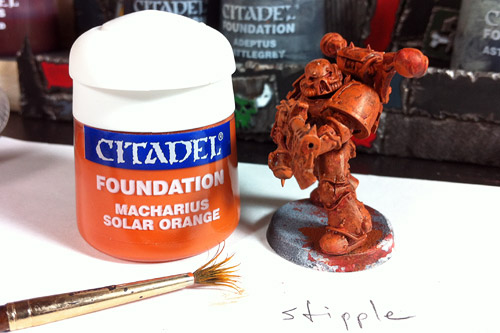

Step 3: light coverage
(clickable)
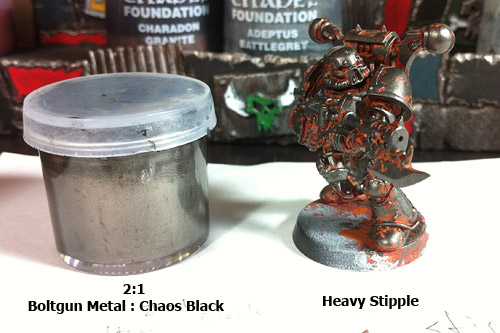

Step 4: heavy coverage
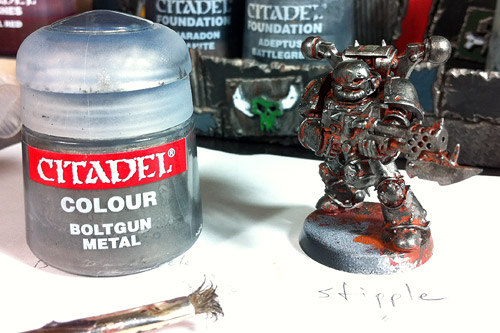

Step 5: leaving a good amount of the prior color
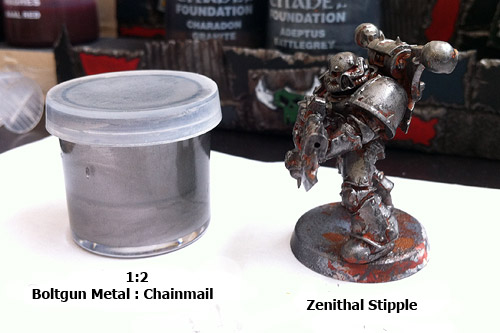

Step 6: only hitting the highlights
(clickable)
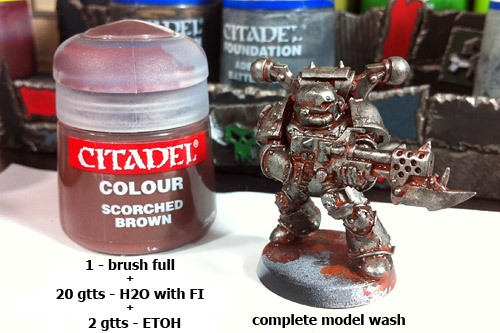

Step 7: all over wash
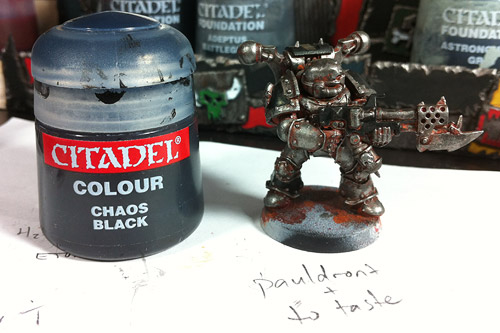

Step 8: anywhere you want black or plan to have hazard striping
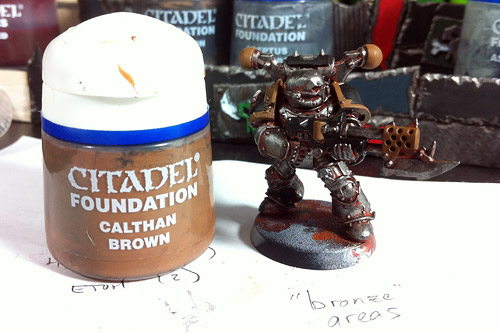

Step 9: any parts you plan to "bronze"
(clickable)
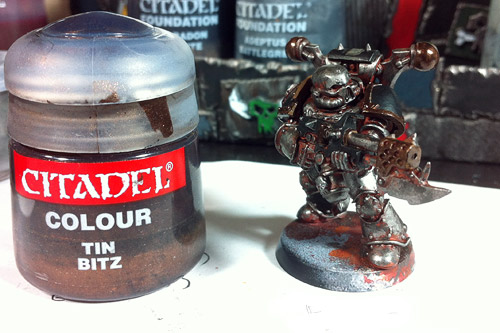

Step 10: can leave prior layer in recesses
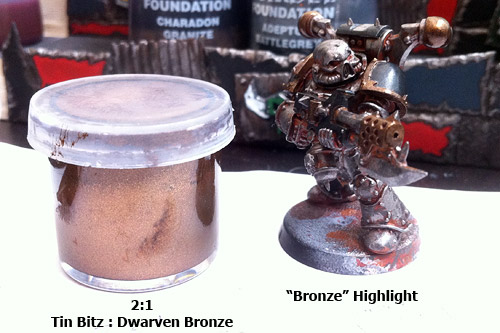

Step 11: highlight bronze areas with an eye towards zenithal highlighting
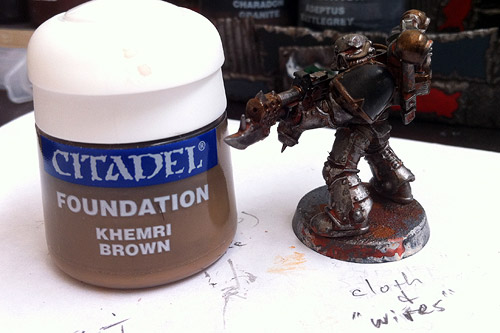

Step 12: cloth underarmour and any non-ribbed wires/tubes/cabling
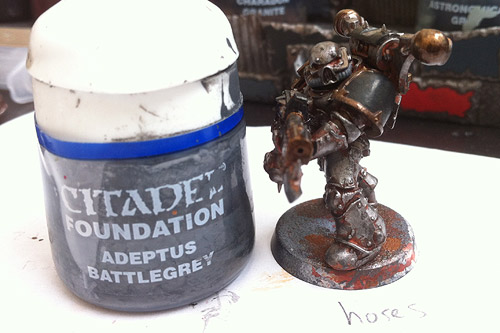

Step 13: all ribbed wires/tubes/cabling
(clickable)
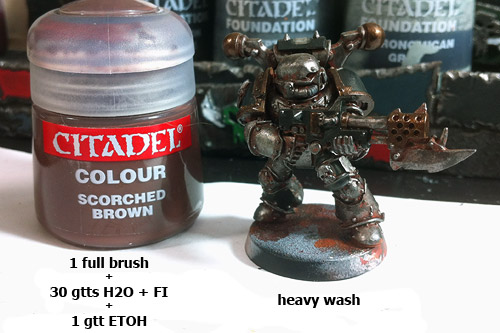

Step 14: wash over all underarmour, iron and bronze
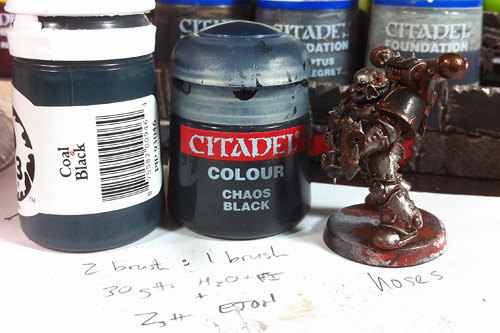

Step 15: wash to all wires/tubes/cabling painted grey above
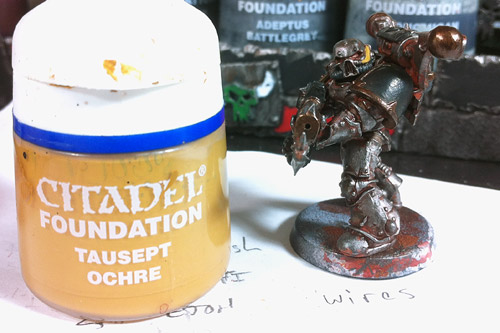

Step 16: highlight to all wires/tubes/cabling painted brown earlier, but not underarmour
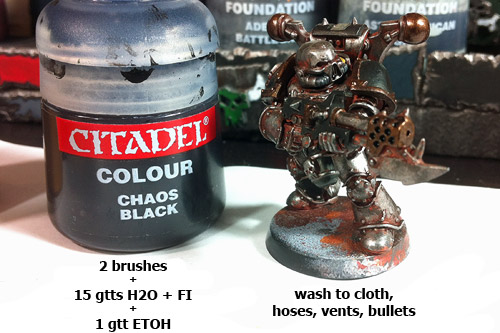

Step 17: wash as described in picture
(clickable)
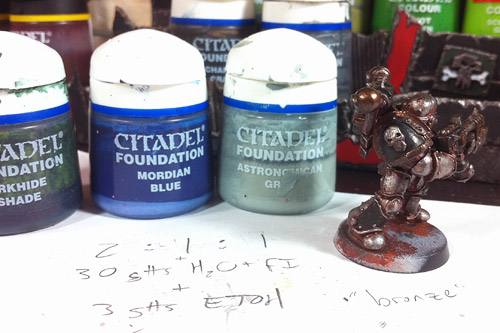

Step 18: thin wash to bronze areas, just enough for subtle patina
(clickable)
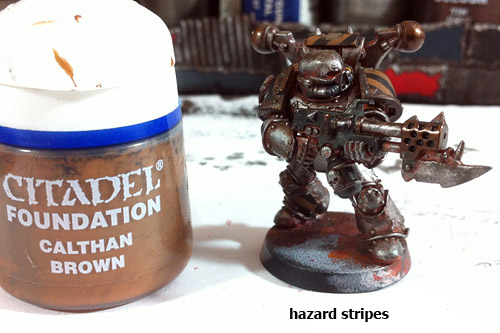

Step 19: first layer of any hazard stripes and skulls, as much or as little as you want
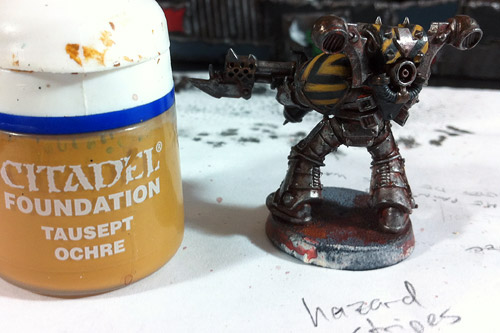

Step 20: highlight the hazard stripes, leaving a little of the brown showing
(clickable)
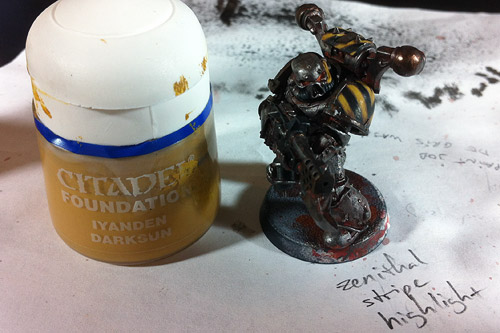

Step 21: zenithal highlight of hazard stripes
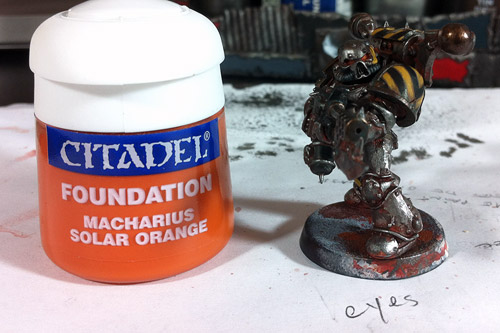

Step 22: over most of the eye lenses
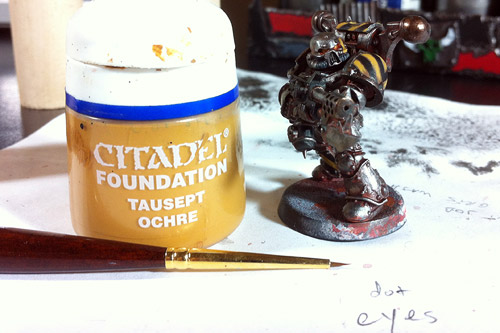

Step 23: just enough to make the eyes pop
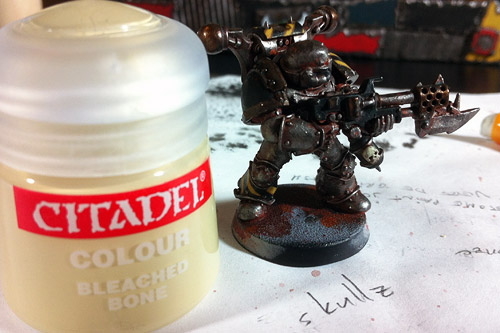

Step 24: 2nd layer to skulls
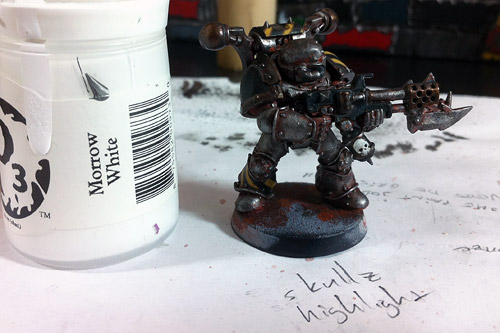

Step 25: final skull highlight
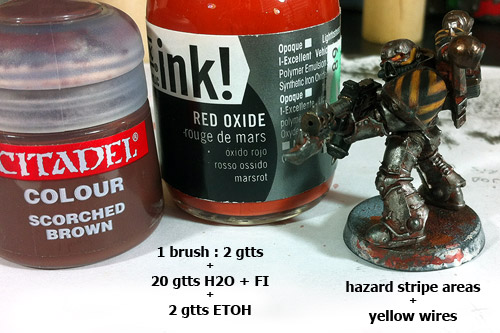

Step 26: wash over the hazard stripes to dampen their brightness
(clickable)
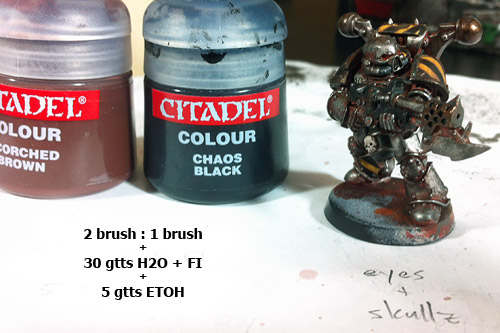

Step 27: a couple thin washes should darken the eye recesses and dampen the bone color nicely

It's a bit labour intensive, but there a couple spots I think I can switch around the color order to streamline the process. It's not quite the competition-level painting I originally hoped to achieve, but I think an entire army painted like this will be fairly stunning on the table. I'm confident enough in the look to enter it in GW's "Armies on Parade" competition once all is said and done.

But that's still a ways off. I've got 43 more dudes, 2 walkers and 5 vehicles to paint. I'm thinkin' "Armies on Parade" will be a 2013 kinda thing...
how-to: rivets

Seems like rivets are one of the eternal problems facing any hobbyist looking to branch into heavy-duty conversions and scratch-building. There are roughly seven gajillion different methods to riveting your models, and I've tried at least 10 of 'em. Because my last two 40K forces have had rivet-intensive conversions (emORKgency! and Iron Warriors), I've developed a healthy respect for Grandt Line's line of "Augmentables." There are several useful bits throughout that page, particularly for Big Meks, but for those seeking your standard rivets, you'll need to go all the way to the bottom of the page.

Now, unless you've got a model railroad background, the scales and measurements on that page will probably have you scratching your head in confusion. The first time I saw the page I had no clue what I was looking at. Particularly how to convert the scale and real-world size of the item into something useable.

"Just how big is a 1/4" scale 1" square nut with bolt?"
"Oh. 0.021 inches!"
"Wait... How big is that"
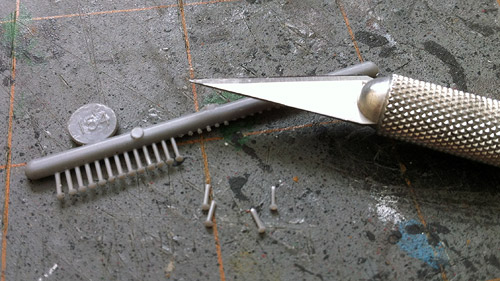
I went with the trial-and-error approach with my first order. I got a smattering of sizes and here's what I've found - when ordering, look at the shape to figure out what you want, then look at the column labelled "Meas. (inches)" to figure out if they've got it in a size that'll work for you. Rivet #154, 0.043", is approximately the same size as the rivets on most GW kits, and the one I've been using on all my Iron Warriors conversions. The smaller bitz tend to look real small real quick and are only good for the fiddly-est pieces of kit - engines, infantry equipment, etc. For vehicles, stick to anything 0.043" and bigger.

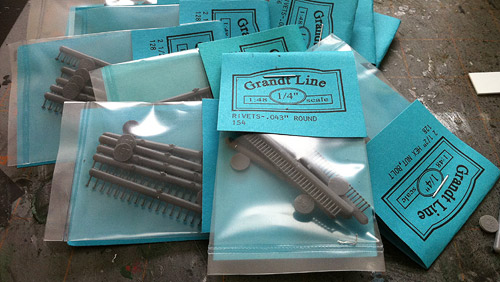
I don't have any of the tinier bits handy, but here are a few of the Augmentables from my recent order:


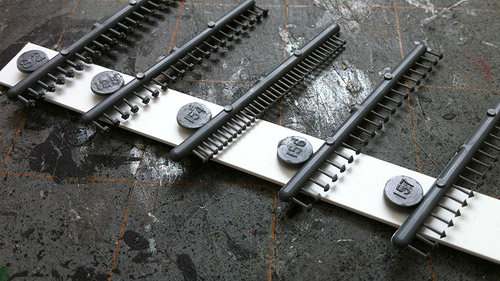
Grandt Line Rivets, Nuts & Bolts (click to zoom)

As you can see, they come 20-35 rivets/nuts/bolts per sprue and there are 5 sprues in each $3.00 pack. Coupled with their ease of use, they really can't be beat. Speaking of ease of use, I snapped some quick shots of how I use them.


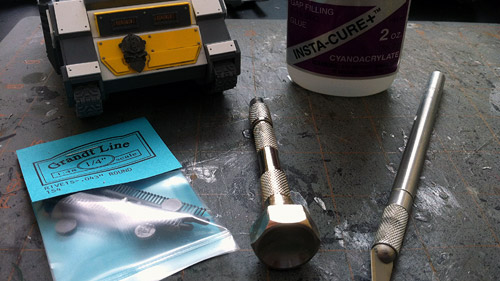
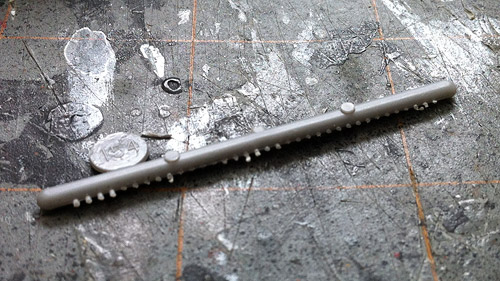
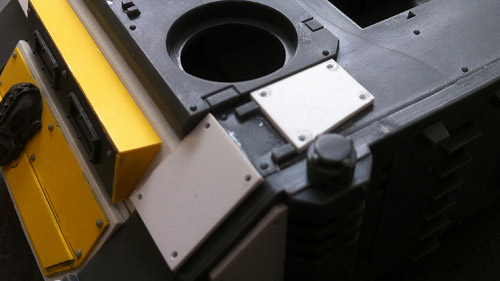
Materials: model, glue, rivets, drill w/ 1/32" drill bit, hobby knife


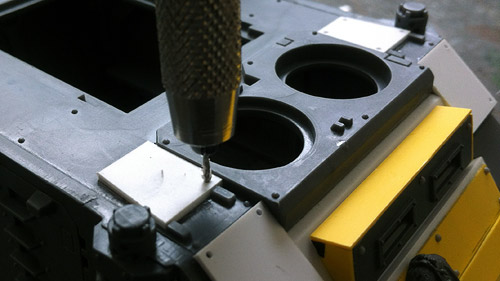
Step 1: drill holes where you want rivets


Step 2: cut some rivets off the sprue


Step 3: put a tiny dab of glue over a few holes
(use a thin glue to avoid "glue bubbles" around the rivet)


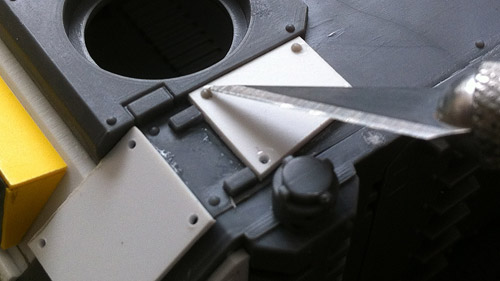
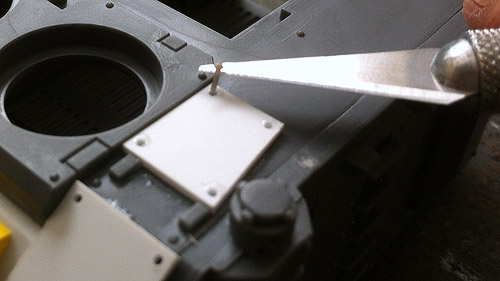
Step 4: use sharp edge of hobby knife to place rivets in holes


Step 5: position the rivet flush with no drill hole showing


Step 6: fill all your holes


Step 7: use up all your rivets


Step 8: order more rivets

They're stupidly easy to implement, more consistent than any "home-made" rivets I've ever tried, and having them drilled into the model makes them far less likely to fall off your model from rough handling than any of the "glue to the model's surface" rivets I've used. For Orkz, I use a variety of sizes and shapes, usually switching up the spacing and rivet type between armour plates to give it that haphazard, sons of Gork & Mork feel. For Imperials, I find the regular rivets work wonders and try to keep consistent spacing throughout to give it that mass-manufactured look.

Hope some of you find this useful, and happy riveting!

Wednesday, February 8, 2012

paint: iron warriors: zigouilliers

Just moments ago I put the finishing touches on my first painted squad of Iron Warriors... (clickable for larger image, please forgive the mediocre iPhone quality)

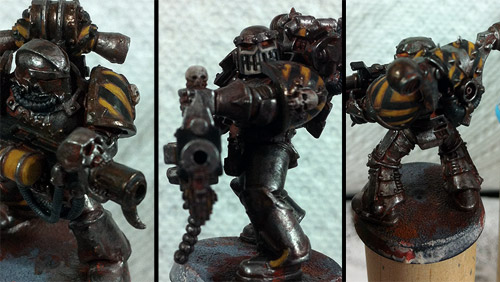
Ahnighito's Zigouilliers: CSM Havocs

Sure, they're missing a banner (haven't decided on which to use yet), the Iron Warrior logo (my freehand-fu is still too weak), and their bases (vacillating on buying vs. building them).. and there's only a couple months 'till Adepticon... But little mans are done. At least these six are. And I'm pretty damn happy with the results!

Zigouillier Close-Ups: Melta, "Ghost", Hazard!

I've got pics of the whole process which I hope to put up by the weekend. It's only 26 steps from white primer to completion. As soon as it's warm and dry enough to prime again I should be able to knock out the other 43 guys in, what, 2-3 days?