One of the great things about being so enamored with Dystopian Wars is that it gives me the chance to build the sea table I never got around to with Uncharted Seas. A couple weeks ago, I went shopping for supplies.

|
All told, I spent a about $65 on new stuff for the table. I found this quite cheap, considering one-third of the cost was epoxy! With supplies in hand, it was time to start on the table.
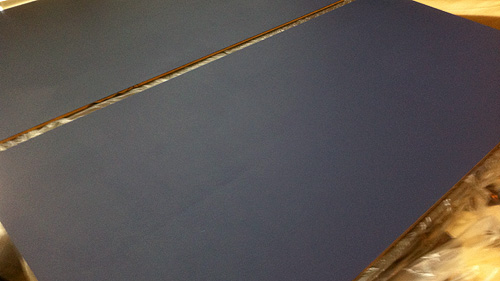
Step 1: Rich Navy
The Rich Navy was applied evenly to all three boards using a roller brush. This used up practically all of the sample pot.
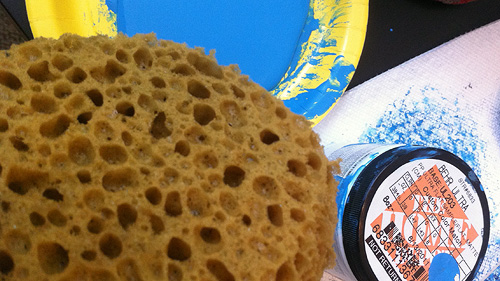
Step 2: Prepare Sponge
Following the instructions on the sponge's packaging, the sponge was dampened before applying any paint. Never use paint on a dry sponge. It'll just gum up your sponge.
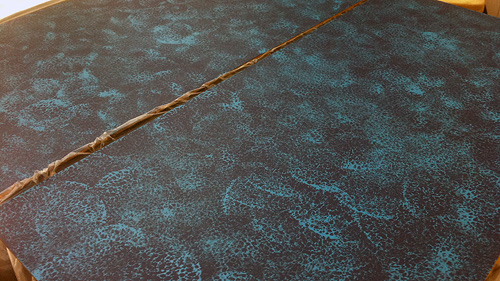
Step 3: Caribbean Sea
The Caribbean Sea paint stippled randomly all over the board, rotating the sponge as needed to keep from having any obvious patterns emerge. I used the flat-face of the sponge for this step, which is why there are so many hard/obvious edges noticeable in the picture above. That's okay for this step, as the next two layers will break that up a bit.
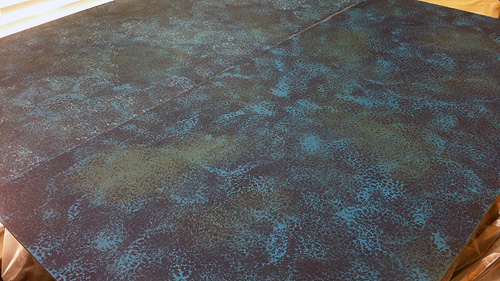
Step 4: Totally Teal
I flipped the sponge over to the rounded side and stippled the teal in randomly placed thick clumps across each board. I then went back and added the occasional diffuse, light-handed stippling over the rest of the board.
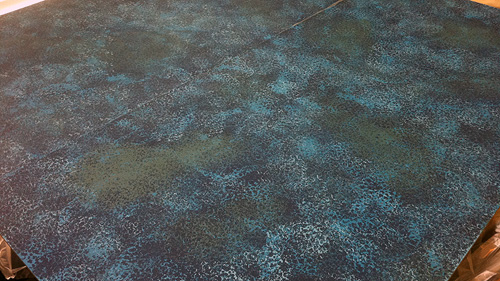
Step 5: Sea Spray
Again using the rounded side, I stippled my lightest blue in diffuse patters all over the board. As you can see in the picture, I tended to shy away from the middle of the teal clumps, but usually encroach on the edges of teal's territory. This is your brightest color and most likely to look like cresting waves, so flavor to taste remembering you can always add more as needed, but taking paint away is a royal pain.
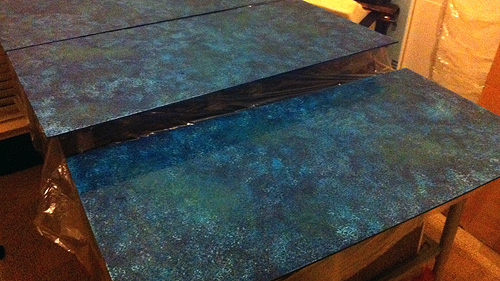
Step 6: Glaze Coat
The epoxy was mixed using 3 oz. of each component part and 5-6 drops of the Liquitex Ink! per board. The glaze coat was applied using the technique seen [url=http://www.youtube.com/watch?v=uVrKhu9_Wxo]here[/url]. Once this step is completed, there's nothing to do but sit back, relax, and let the resin cure over the next 72 hours!
In the interest of full disclosure, I did do a test run or two before starting in on the tables in earnest. Despite the cheap cost of most of the components, I didn't want to screw up a full-size board and have to start over. Small, flat pieces of scrap wood allowed me to experiment with paint ratios and stippling techniques using the sponge. Once I had that down, practiced with small, half-to-one ounce batches of the glaze coat to figure out that process. Personally, I find that a thick application of glaze stippled with towel looked FAR more wave-like than a thin application.
Oh, one last thing! The glaze is easily the most expensive single component of the build and I was a little worried that a quart wouldn't be enough to cover the table. The box says it covers 8 square feet at 1/8" deep. Don't let this concern you. As you can see from the first pic in this post, I've still got about 1/4 of the glaze leftover after finishing. I feel confident saying you could easily cover 8'x4' of board with the quart, and could possibly stretch it to cover 10'x4' if you didn't waste any on testing your technique.
I'll try to get some more comprehensive shots showing off the glaze this week after I know that it's fully cured. Tests at 24 hours showed it to still be a little tacky.
Outstanding job! I am beginning my table this week. Two questions: do you think 1/4" plywood is a worse choice than the 1/4" MDF; and do you think P3 blue ink will work as well as the Liquitex ink you used?
ReplyDeleteCheers, James
In my experience 1/4" plywood is more prone to warping, particularly when you apply paint to one side. I've had some success mitigating this by priming the top and bottom with a coat of paint, but not with consistent results.
ReplyDeleteAs far as the P3 Ink goes, I've no experience with it, but don't have a reason it shouldn't work. When in doubt, mix up a sample batch to see if it works. A couple teaspoons of each of the Glass Coat elements and a drop of P3 Ink should be enough. Do a wave sample on a piece of scrap wood or thick card, then brush on your sample glass coat. Should give you a decent idea as to how it'll turn out.