So, a couple days after posting about my sea table, I went back to check the glaze coat and take some glamour shots. In several spots the glaze was still tacky, like congealed syrup. Well damn. I done screwed it up. The test coats dried correctly, and I'm 99% sure I got the resin/hardener ratio spot-on. This leaves my mixing method suspect. I used tall, opaque, plastic cups to mix the glaze, and I've a feeling that I might have left several areas less mixed than others. As I poured, I noticed the blue-tinge from the ink appeared to get lighter, which would support this theory. This left me with two options, try to fix it, or start over.
Either solutions required buying a new quart of glaze coat, so I first tried to fix it on a single panel. I carefully mixed up a second layer of glaze, combining resin and hardener in a clear, shallow container and mixing thoroughly before pouring. The mixing method worked, and it hardened like a champ. A new de-bubblig method using a straw to better focus my exhalations also worked like a champ. However, stippling to produce waves left sticky areas exposed, while not stippling left a surface neither flat enough to be glass, nor wavy enough to evoke waves. Ultimately, it was a knowledge success, but a hobby fail.
So back to the store I went...
Round 2: FIGHT!
Since the islands I've been working on are more tropical, I took the opportunity to pick up a couple new shades of paint in the hopes of lightening up the board overall. Don't get me wrong, I thought the board looked amazing, but I did feel that the blue-tinged glaze coat ended it a shade dark for South Pacific-themed islands. I grabbed a new pot of "Rich Navy" as well as the shades "Pool Party" and "Tropical Surf".

Step 1: Edging
I used an old dark blue craft paint I had hanging around to darken the edges. On the first table it was the last painting step, and the edges ended up slightly tinted, despite my best efforts.
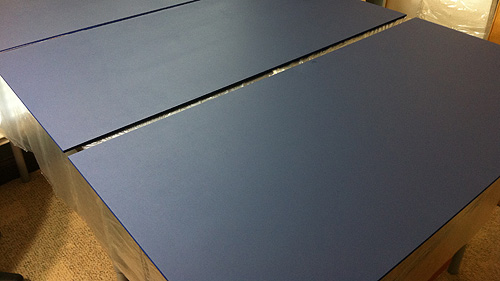
Step 2: Rich Navy
Again, roller brushed all over the board and using up almost all of the sample pot.
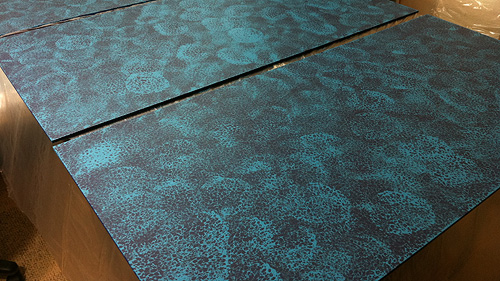
Step 3: Caribbean Sea
Sponged on using a stippling technique, covering more of the board than last time.
Step 4: Pool Party
Sponged on in a light coat across the entire board.
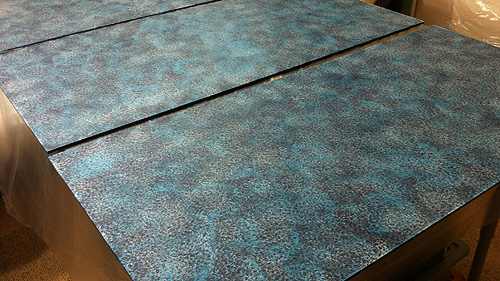
Step 5: Totally Teal
Step 6: Tropical Surf
The Teal was sponged in thick clumps in whatever place and pattern struck my fancy. The Surf was then added in even smaller, more diffuse patterns across the board. Theoretically, these are your highest/brightest waves.
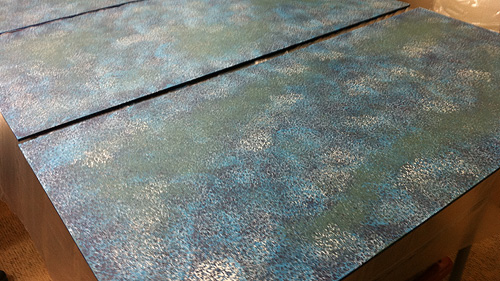
As of right now, I've got mixed feelings on the second board. I like the more varied forms of the green/algae/seaweed, and the board is certainly lighter than the last. I'm afraid, however, that I may have gone a bit too far the other way, been heavy-handed with the sponge, and used too many colors. I think the Prussian Blue-tinted glaze will tone all that down a bit, but really don't want to come back with "sea table: take 3" because I screwed this up.
I think I'll marinate on these colors a day or two before glaze coating. It's easy and cheap to fix the paint. It's a PITA to have to start all over.
So, how did this version turn out? I am making a very similar tabletop out of 1/4 plywood and your posts have been very helpful.
ReplyDeleteCheers!
So far it's turned out better. The first panel was done over the weekend with good results. Got the second panel glass-coated today and took pics. Should have a full post by the end of the week, but the key points are that I put a smidge extra hardener in the mix, and used a shallow, see-through, flat-bottomed container to make sure both parts mixed thoroughly prior to adding the ink. Other than that, it was pretty much the same process as before.
ReplyDelete