Showing posts with label how-to. Show all posts

Friday, February 10, 2012

paint: iron warriors: recipe

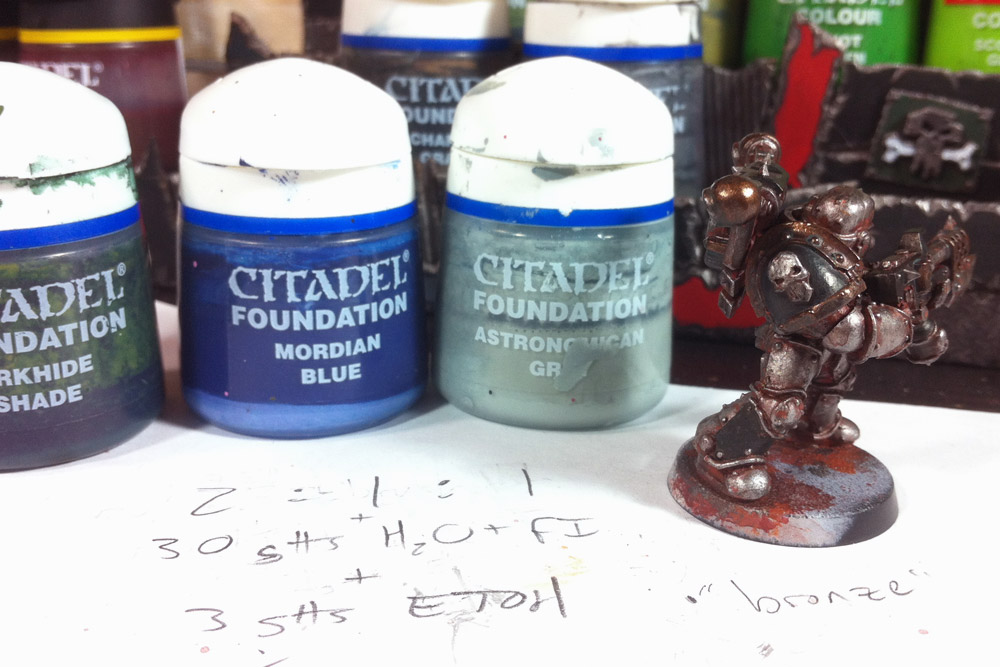
While painting up the Zigouilliers, I used my cell phone, a pencil and scrap of white paper to keep visual notes of what paints I used where. I plan to use these notes as my recipe for the rest of the army, with slight variations depending on troop type or squad. There's some short-hand in the pics, the key of which is here:
  • gtts: medical abbreviation for drops
  • H2O + FI: a 10:1 mix of distilled water and Liquitex Flow Improver
  • ETOH: 70% alcohol obtained from the drug store
  • zenithal: applied from above, as if coming down from a spotlight directly overhead

All models are primed white, and any non-stippled, non-wash colors were applied using a home-made wet palette.


Step 1: complete coverage


Step 2: moderate coverage


Step 3: light coverage
(clickable)
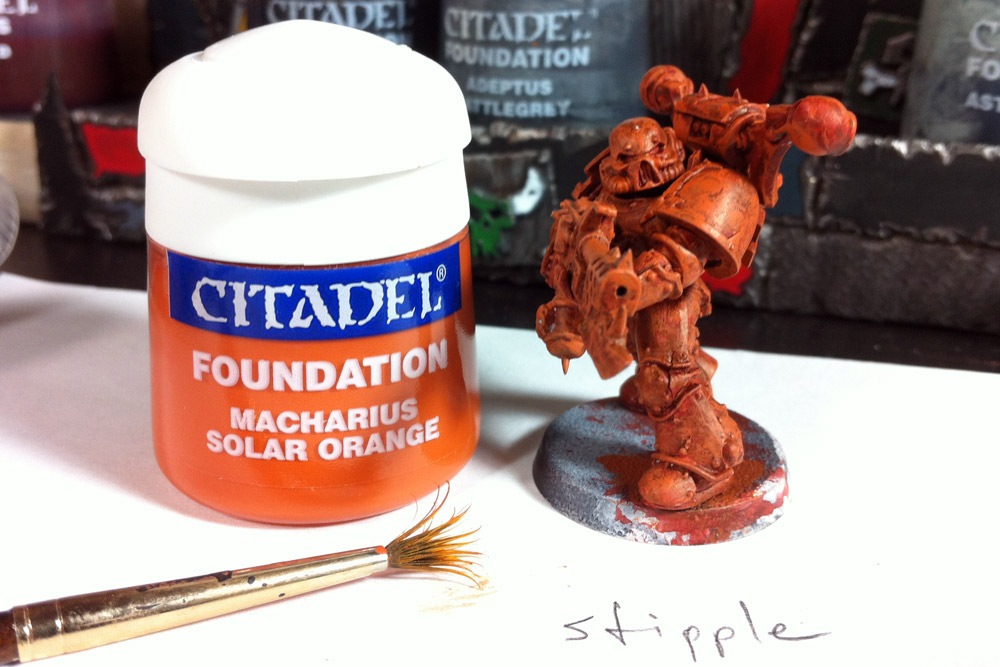

Step 4: heavy coverage


Step 5: leaving a good amount of the prior color


Step 6: only hitting the highlights
(clickable)
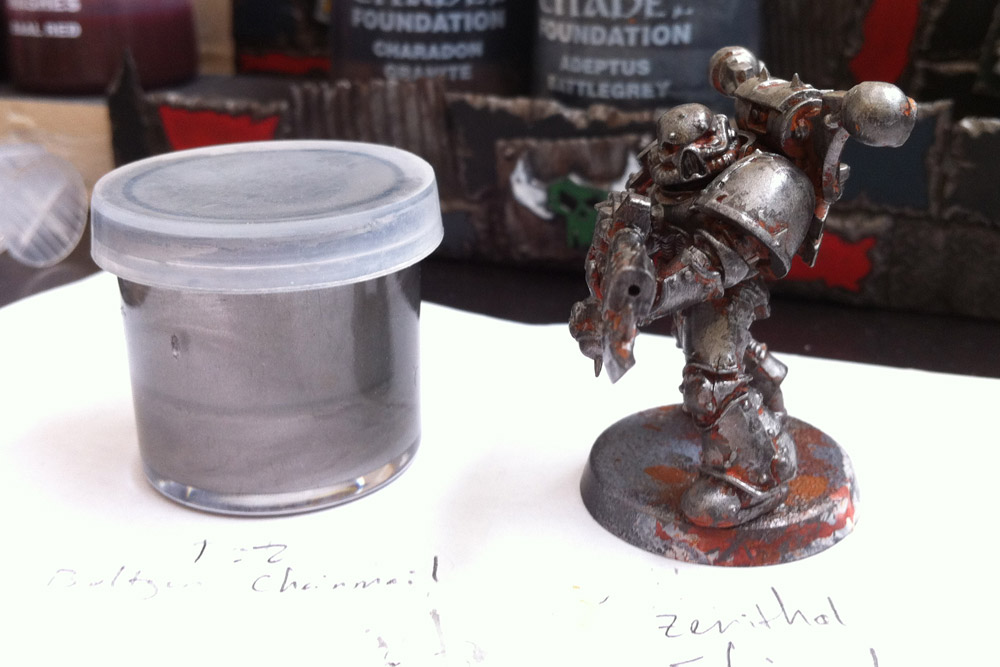

Step 7: all over wash


Step 8: anywhere you want black or plan to have hazard striping


Step 9: any parts you plan to "bronze"
(clickable)


Step 10: can leave prior layer in recesses


Step 11: highlight bronze areas with an eye towards zenithal highlighting


Step 12: cloth underarmour and any non-ribbed wires/tubes/cabling


Step 13: all ribbed wires/tubes/cabling
(clickable)
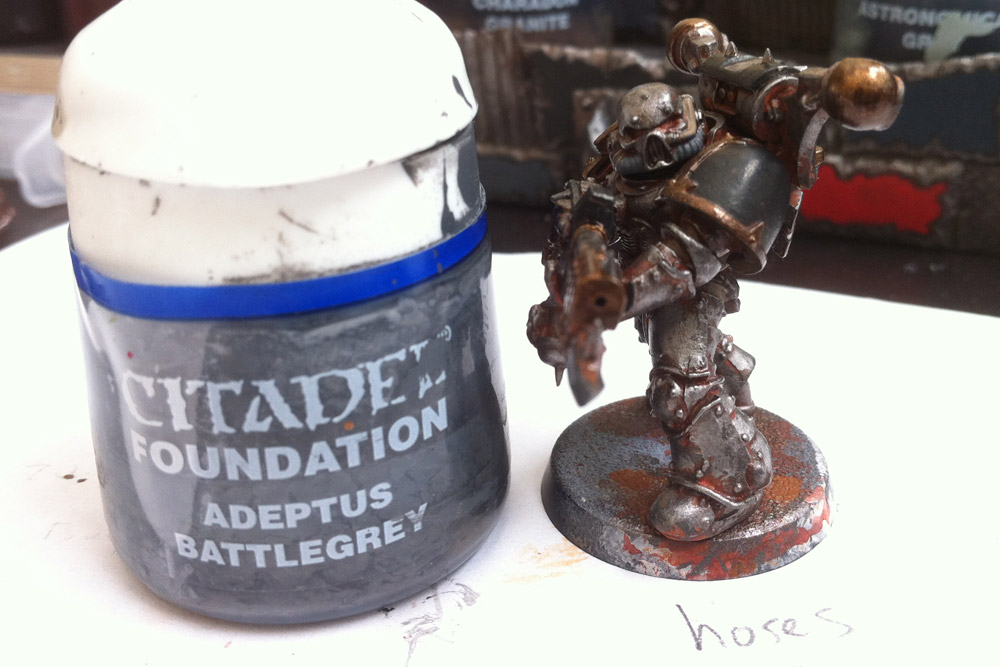

Step 14: wash over all underarmour, iron and bronze


Step 15: wash to all wires/tubes/cabling painted grey above


Step 16: highlight to all wires/tubes/cabling painted brown earlier, but not underarmour


Step 17: wash as described in picture
(clickable)
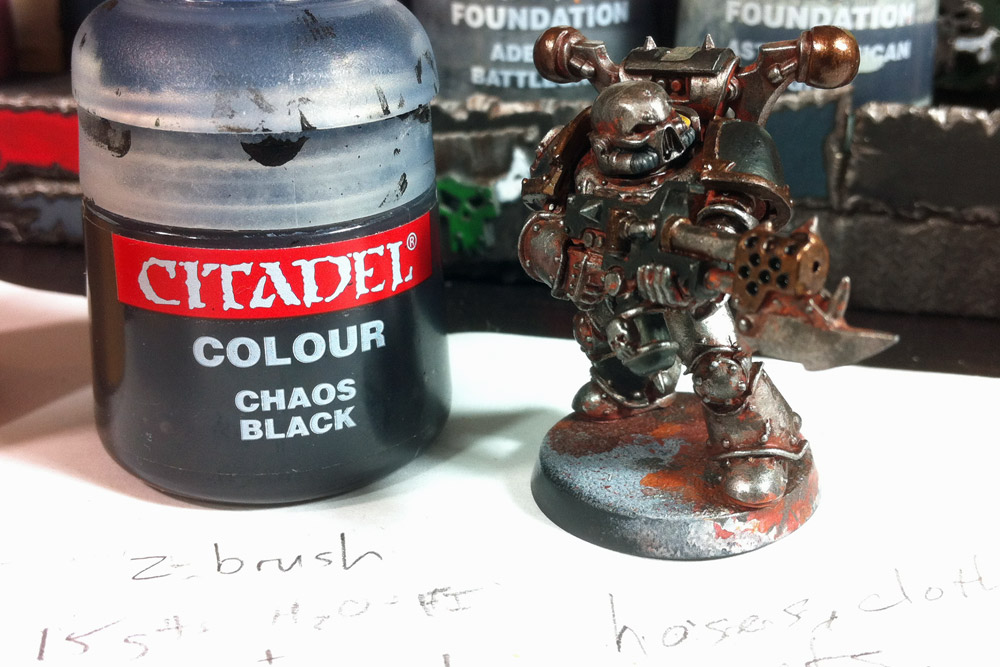

Step 18: thin wash to bronze areas, just enough for subtle patina
(clickable)

Step 19: first layer of any hazard stripes and skulls, as much or as little as you want


Step 20: highlight the hazard stripes, leaving a little of the brown showing
(clickable)


Step 21: zenithal highlight of hazard stripes


Step 22: over most of the eye lenses


Step 23: just enough to make the eyes pop


Step 24: 2nd layer to skulls


Step 25: final skull highlight


Step 26: wash over the hazard stripes to dampen their brightness
(clickable)
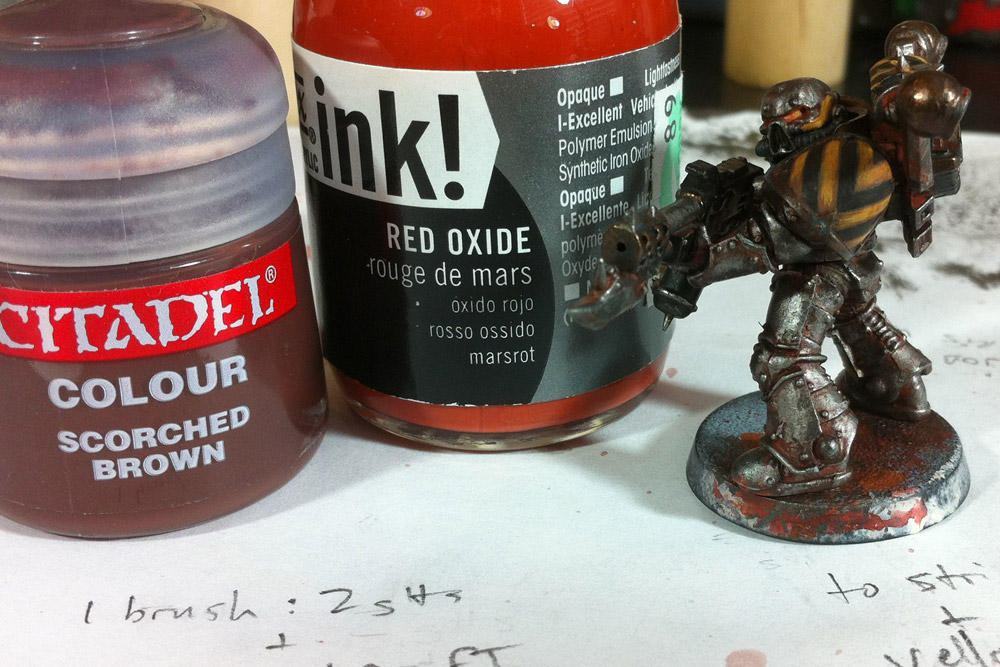

Step 27: a couple thin washes should darken the eye recesses and dampen the bone color nicely

It's a bit labour intensive, but there a couple spots I think I can switch around the color order to streamline the process. It's not quite the competition-level painting I originally hoped to achieve, but I think an entire army painted like this will be fairly stunning on the table. I'm confident enough in the look to enter it in GW's "Armies on Parade" competition once all is said and done.

But that's still a ways off. I've got 43 more dudes, 2 walkers and 5 vehicles to paint. I'm thinkin' "Armies on Parade" will be a 2013 kinda thing...

how-to: rivets

Seems like rivets are one of the eternal problems facing any hobbyist looking to branch into heavy-duty conversions and scratch-building. There are roughly seven gajillion different methods to riveting your models, and I've tried at least 10 of 'em. Because my last two 40K forces have had rivet-intensive conversions (emORKgency! and Iron Warriors), I've developed a healthy respect for Grandt Line's line of "Augmentables." There are several useful bits throughout that page, particularly for Big Meks, but for those seeking your standard rivets, you'll need to go all the way to the bottom of the page.

Now, unless you've got a model railroad background, the scales and measurements on that page will probably have you scratching your head in confusion. The first time I saw the page I had no clue what I was looking at. Particularly how to convert the scale and real-world size of the item into something useable.

"Just how big is a 1/4" scale 1" square nut with bolt?"
"Oh. 0.021 inches!"
"Wait... How big is that"

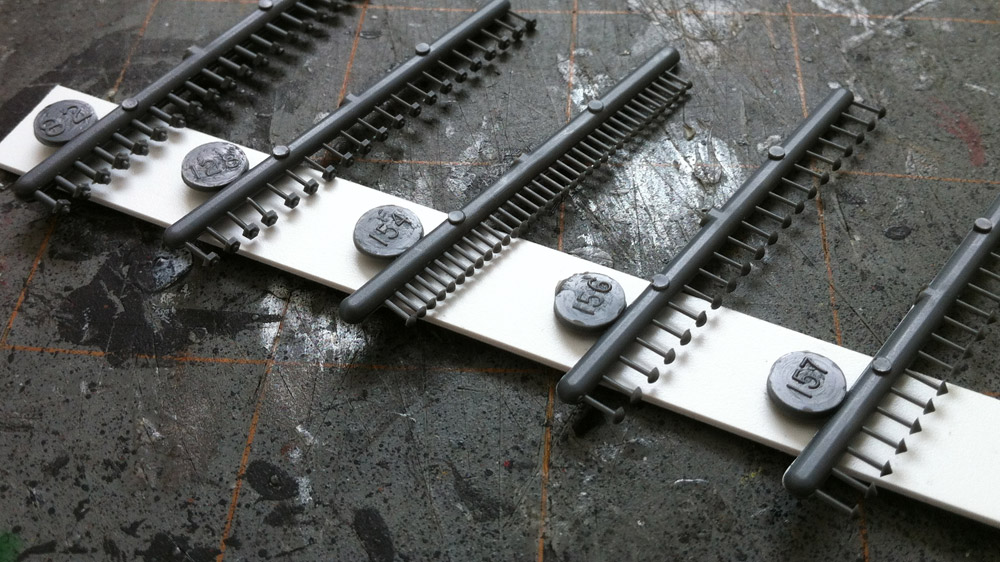
I went with the trial-and-error approach with my first order. I got a smattering of sizes and here's what I've found - when ordering, look at the shape to figure out what you want, then look at the column labelled "Meas. (inches)" to figure out if they've got it in a size that'll work for you. Rivet #154, 0.043", is approximately the same size as the rivets on most GW kits, and the one I've been using on all my Iron Warriors conversions. The smaller bitz tend to look real small real quick and are only good for the fiddly-est pieces of kit - engines, infantry equipment, etc. For vehicles, stick to anything 0.043" and bigger.

I don't have any of the tinier bits handy, but here are a few of the Augmentables from my recent order:


Grandt Line Rivets, Nuts & Bolts (click to zoom)

As you can see, they come 20-35 rivets/nuts/bolts per sprue and there are 5 sprues in each $3.00 pack. Coupled with their ease of use, they really can't be beat. Speaking of ease of use, I snapped some quick shots of how I use them.


Materials: model, glue, rivets, drill w/ 1/32" drill bit, hobby knife


Step 1: drill holes where you want rivets


Step 2: cut some rivets off the sprue


Step 3: put a tiny dab of glue over a few holes
(use a thin glue to avoid "glue bubbles" around the rivet)


Step 4: use sharp edge of hobby knife to place rivets in holes


Step 5: position the rivet flush with no drill hole showing


Step 6: fill all your holes


Step 7: use up all your rivets


Step 8: order more rivets

They're stupidly easy to implement, more consistent than any "home-made" rivets I've ever tried, and having them drilled into the model makes them far less likely to fall off your model from rough handling than any of the "glue to the model's surface" rivets I've used. For Orkz, I use a variety of sizes and shapes, usually switching up the spacing and rivet type between armour plates to give it that haphazard, sons of Gork & Mork feel. For Imperials, I find the regular rivets work wonders and try to keep consistent spacing throughout to give it that mass-manufactured look.

Hope some of you find this useful, and happy riveting!

Wednesday, August 3, 2011

build: sea table: take 2, part 2

Almost a month ago I restarted my sea table, after screwing it up on the first go 'round. While I initially took "a couple days off" to stew over whether I liked the paint job, my nervousness about screwing it up again made it easy to be distracted with other hobby projects. This past weekend I took the opportunity during the kid's nap time to bite the bullet, mix up a small batch of glass coat and finish one of the three boards. Part of this was due to necessity, no telling how long the kids will nap from day-to-day, and partly due to economy, if I screwed it up again, I'd have only wasted one 2' x 4' board. I'm happy to report that it worked well enough for me to spend today's nap time coating up a second board and document the process as I went along.


Step 1: gather supplies

L-to-R: Cheap, throw-away brush. Glass coat. Popsicle stick. Shallow, see-through container. Four 3 oz. cups. Straw.


Step 2: pour glass coat

The glass coat is labelled "Side A" and "Side B" so I've labelled the cups accordingly and filled two cups of each part. Because of the hobby fail with the last table, I filled the "B" cups 2-3 millimeters higher than the corresponding "A" cup. I'm pretty sure you can follow the package directions and go even-stevens as long as you mix thoroughly.


Step 3: make water

  • Top left: Pour the contents of each cup into your mixing container. Again, because of the hobby fail last time, I chose to use a shallow, see-through container this go 'round to so I could have visual confirmation that the two parts mixed thoroughly.
  • Top right: Using your popsicle stick, mix thoroughly. I went through for a good two minutes mixing the parts. As you start you'll see milky, silvery strands where the two parts are mixing. Eventually, the color will even out through most of the mix and, depending on how vigorously you stirred, you'll have a multitude of bubbles. In this regard, the slower you stir the better.
  • Bottom left: Add 7 drops of blue ink.
  • Bottom right: Again, mix thoroughly until the color is mostly even throughout the mix. After this step, I gently agitate the container to bring the bigger bubbles to the surface and then slowly exhale over them. This breaks the bubbles readily, while fanned air does not. I've read that it has something to do with an exhalation's higher quantities of carbon dioxide.


Step 4: pour!

Dump your glass coat mixture over your board. I try to spread it as far as possible now so that it's easier to spread out by brush in the next step. As far as I've found, there's no good way to rinse out hardening resin, so go ahead and throw away your mixing container. It's useless to you now.


Step 5: spread!

Using your cheap brush, spread the glass coat mix over your board making sure that every inch has some glass coat on it. Go for a relatively even coat across the board, but don't sweat it if it's a little thicker in some areas than others. If you've got some latex gloves handy, go ahead and don them now. Cheap brushes like to leave a few bristles on the board and you may need to go fishing them out. Like the mixing container, your cheap brush is now useless. Chuck it.


Step 6: prep your towels

The one supply I forgot to put in the group shot - paper towels. You'll use several with each board. I go ahead and make 'em double-layered (left) before I scrunch 'em (right), and find it more efficient to blot double-fisted. Your mileage may vary.


Step 7: blot!

Methodically blot the surface of your board. I alternate hands and rotate as I go just to make sure no patterns appear in the surface. The above pic was taken halfway through the process. The reflection of the blinds shows where I stopped to take the picture.

Step 8: blow bubbles

Unfortunately, the pics for this step didn't turn out at all. I'm afraid you'll have to rely solely on my description. Using your straw, methodically blow over the surface of the board. As you pass over them, it's kinda fun to watch 'em pop.


Step 9: re-blot!
Step 10: re-blow!

I find that one blot pass leaves too smooth a surface for my liking, so I repeat the process of blot and blow across the entire board. By this time, the resin has started to stiffen and has even less elasticity to pull itself back into larger blobs.

That's it! There's nothing left to do but let the glass coat cure 'till it's solid. I believe the instructions say 72 hours for a complete cure, but check your instructions to be sure. If you've got the time and space, there's no reason you couldn't do a complete 4' x 6' board in 2-3 hours.

Sunday, July 24, 2011

build: work-in-progress: paint stands, step-by-step

So it turns out that the two paint stands I built were about 13 spaces shy of holding all the Citadel and P3 paint pots I currently own, much less the colors I'll be adding as needed. With that in mind, I started work on a couple new stands using the same blueprint. I changed the assembly steps a bit to make the process faster/easier and, this time, tried to document the process in a meaningful way.


Step 1: Cut and assemble your pieces


Step 2: Glue the 1/2" bars to the underside of each platform


Step 3: Pair the platforms, glue them together


Step 4: Glue the paired platforms together


Step 5: Glue your horizontal and vertical braces in place


Step 6: Decorate to taste

I've tried to get creative gussying up each base, partially to see what I can do, partially to show that there's as many options as are there are thoughts in your head. Experiment, play, and have fun. I'll end with some completed shots of the first two paint stands. I hope to have the next two (stonework and grandstand) finished by this time next week.


Ork


Tom Sawyer


In Situ

I'd forgotten I had some of the old, hexagonal Citadel paint pots. They don't fit quite as well and overlap about 1/16" on both sides of the stand. If you've got a ton of those old pots, you may want to add 1/4" or so to the width of your stands.