Chelonian III & Scutum IX

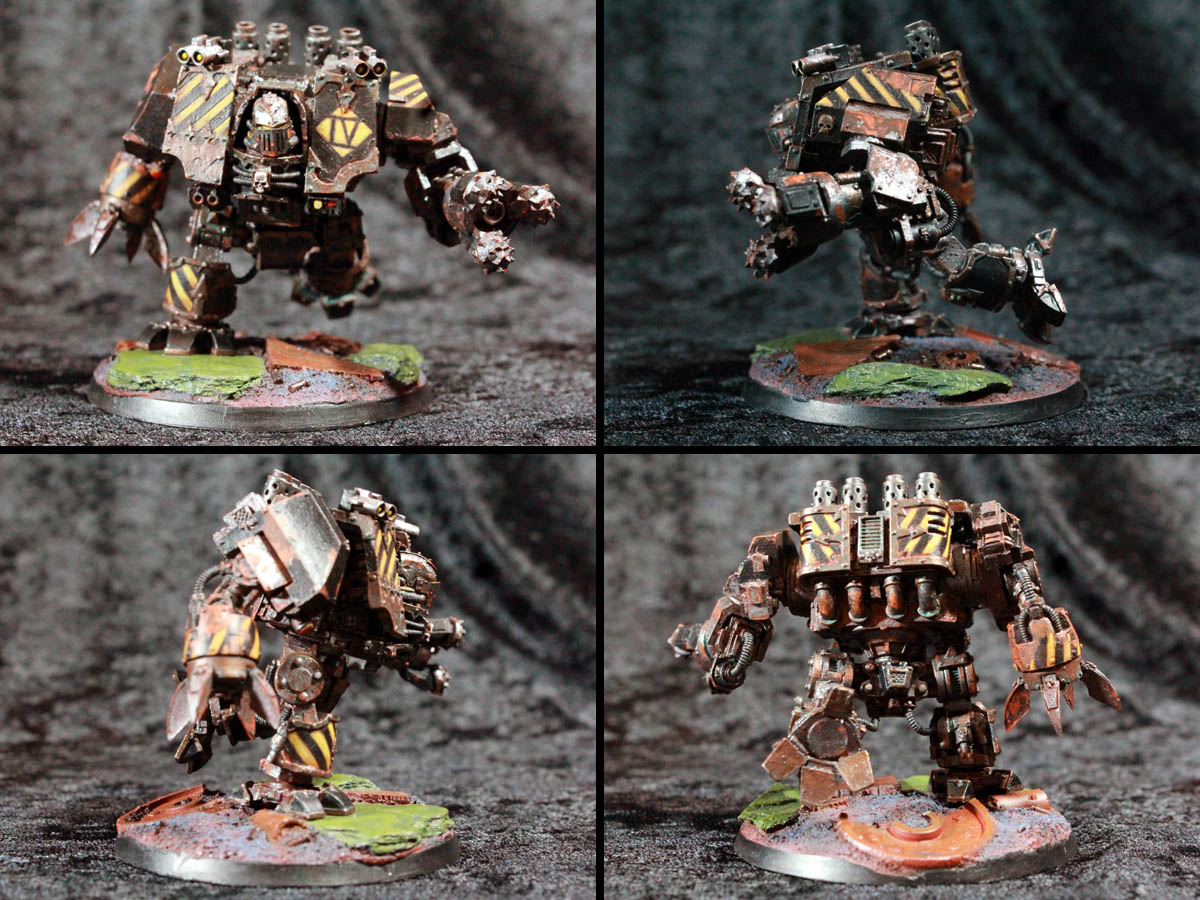
Work continues on the Iron Warriors. I'm just about ready for salt-masking...
Warsmith Thokcha's Rusted Motor Pool!

...fingers crossed it goes as well, or slightly better, than it did on the Hell Brutes.
Chelonian III & Scutum IX
Work continues on the Iron Warriors. I'm just about ready for salt-masking...
Warsmith Thokcha's Rusted Motor Pool!
...fingers crossed it goes as well, or slightly better, than it did on the Hell Brutes.
Sturm: Helbrute: add CCW, heavy flamer, power scourge
(clickable)

Sturm's companion Helbrute, Drang, hasn't had any work done since we saw him last. I think he'll be an intermittent project until I can knock out the rest of the vehicle base coats all at once. Because of the sheer surface area of stippling and salt masking 5 Rhino-sized vehicles with dozer blades, this will require a solid chunk of uninterrupted hobby time. I'm hoping to find such a chunk before August switches over to September.
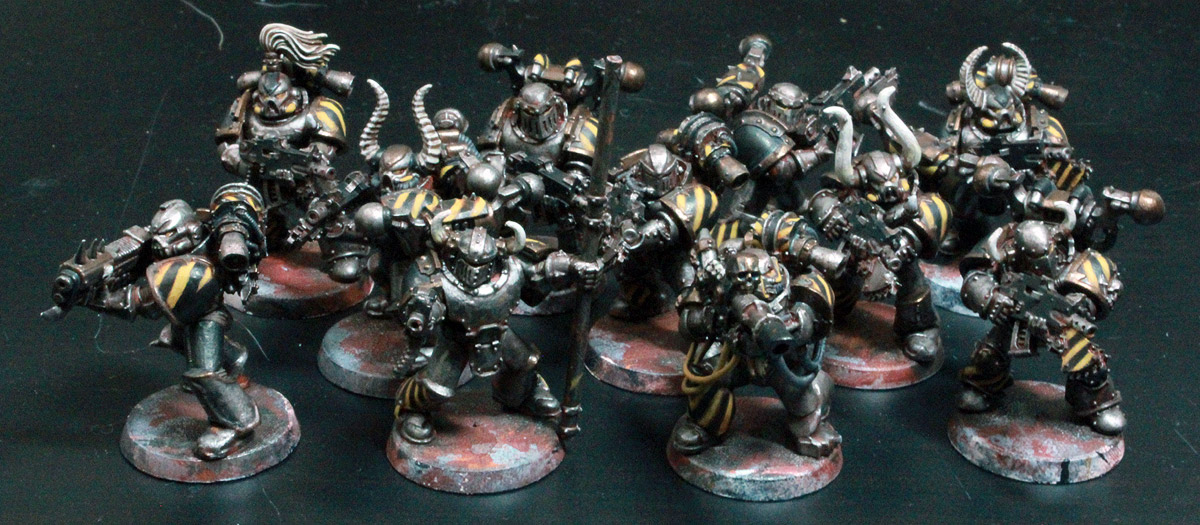
Iron Palatine Gibeon leads Breaching Squad Aerugo
Iron Palatine Gibeon: Chaos Lord: Burning Brand of Skallathrax, Veteran of the Long War, Mark of Nurgle
(clickable)
Breaching Squad Aerugo: Plague Marines: bolter, plasma gun, flamer
Breaching Squad Aerugo: Plague Marines: bolter x3
It's been a VERY long time coming, but with these 7 models done, I've now completed all the infantry models from my original Iron Warriors list built... how many years ago? I know that none of the models have the IW logo on the right shoulder, and that the banner poles are bare, but they're finally to a point that I don't feel embarrassed fielding them for small games or Zone Mortalis. To go bigger, I'll need to finish the 7 vehicles I originally built for the list...


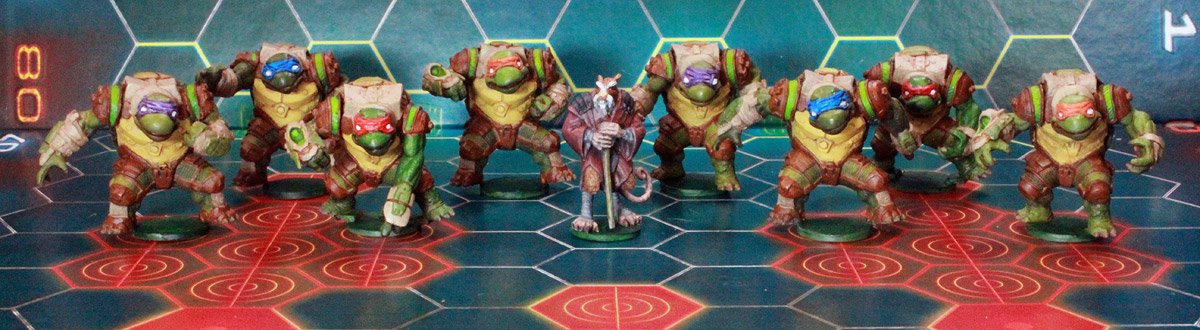
At last, and with just hours to spare before the big road trip, the Turtons are ready to take to the pitch! They even have a snazzy logo to go with 'em!
(Most of the pics in this article are clickable for a larger view.)

L-to-R: Donnie, Raph, Leo, Mikey
L-to-R: Einstein, Spike, Vince, Angelo
You may notice that none of the Turtons have numbers. I've got a quick method for telling them apart based on the Turton's mask and which scute is darkened. If the darker scute is on the left, they use a traditional name/color combo. If the dark scute is on the right, they're using an alternate name that ties to the original character.
I think they all look pretty good, but I'm most proud of Coach Splinter. The paint flowed far more easily on this model, and I can't wait to get some feedback from Damon, Celso, Andrew et. al to see what I did right, what I did wrong, and suggestions for improvement. Oddly, I'm particularly fond of how his hands came out.

While the team is ready to play, I'm not 100% there yet. I'll probably finish the custom roster Wednesday morning and head to the Kinko's just down the road to print 'em up. THEN I'll be 100% ready to for Saturday night!
| Shellshock Pizz-er-ee-ah Turtons Shellshock Pizz-er-ee-ah Turtons Shellshock Pizz-er-ee-ah Turtons Shockingly bold flavor! Shellshock Pizza! - Advertisement jingle |
Started this morning by putting a quick splash of VMA Black Metal over the salt to get my base metal/shadows taken care of. My second layer however, VMA Gun Grey, must be from a bad batch. There's WAY to much pigment in the bottle and it clumps no matter how I thin it. The color clogged my airbrush so quick this morning that after three cleanings, I still didn't have a drop of Gun Grey on my model.
Went out for my morning run thinking I'd either have to make a trip to the hobby shop today or wait until after Adepticon to complete the next step. Funny thing about running, it sometimes clears the head enough to rethink a problem. Somewhere around mile two, I got the bright idea to try mixing my shadow and highlight to create a mid-tone close enough to work. After some experimentation, I ended up using a 4:1 ratio of VMA Black Metal to VMA Steel for the mid-tone, and sprayed from an angle 45 degrees above the model. Seemed to work well, so I smacked all the bits with straight VMA steel from directly above.

The overall effect is lighter than I usually go for, but once I've washed it a few times and/or oiled it up, I think that'll calm down. I'm a little worried there might be too many layers to easily pull off the salt. Need to make sure all the layers I dry, so I'm going to wait 'till everyone's asleep before I pull out the warm water and Q-tips and see if the experiment worked.

First up I put the rust layers down. The airbrush got the first layer of Vallejo Model Air's "Hull Red" down quick, but stippling the usual combo of Citadel's "Vermin Brown" and "Macharius Solar Orange" took far longer than it did on infantry. I'll likely switch to sponging the rust on when I get to the Rhinos and Vindicators.
With the rust down, I spent some time searching the internet for "salt mask weathering" and found several articles aimed at scale modelers. Once I found Roman's article on the subject I headed to the store to find some Aquanet and coarse sea salt. With some fear in my heart and a "Well, you can always strip 'em again" shrug on my shoulders, I proceeded to spray and sprinkle all the parts.

I won't lie, the salt looks a bit heavy-handed from here. However, I figure it'll be fairly easy to cover up excess rust, but a royal pain-in-the-but to add rust over metal later. The plan is to let the parts dry overnight and start applying metals in the morning. I may tape my fingers crossed before going to bed...
Turtons: (clockwise from top left) Donnies, Raphs, Mikeys, Leos.
I tried to do the "pre-shading with glaze" technique thing, but my technique needs some work. They're not "bad" per se, they're just not matching my minds eye. In fact, they're not significantly different than my usual gaming standard. They'll be a decent table-top standard when done, and I think I've learned a little about the technique in the process.
In fact, I think I've already been able to put some of the lessons to good use...
Turtons: Coach Splinter
Yes, it's a crappy cell-phone pic, but I assure you that his shading is coming more from paint than the room's lighting. I'm kinda jazzed with my glazing efforts here, and hope I can finish the rest of the figure to the same standard I've started with his robes. Of the models I'm bringing to Adepticon, he's the one I'm most enthused about showing to my cpainter friend contingent.
Still left on the to-do list...
And last, but certainly not least, I need to finalize my team name and logo. I've lost count of all the names I've gone through, but fitting "Halfshell Heroes" into the cartoon's logo isn't as evocative as I'd thought, nor are any of the words I've tried to shoe-horn into the "turtles" slot. At this point I've decided I'll combine the original word and the Dreadball race I pilfered into the word "Turtons". The team name as of last week, "Vintage Cartoon Ninja Turtons," is a bit too blatant, and feels like someone from our world shoe-horning a theme instead of a corporately sponsored team playing Dreadball. With that in mind, I've been playing with the idea of a corporate identity in the "Teenage Mutant Ninja" header. The most recent contenders for team name are...
I need to pick one soon so I can finish the typography and get to work on a backing logo. Feedback, criticism and suggestions more than welcome.


Just as I tried to subtly differentiate my Nurgle marked marines through excess rust and corrosion, I tried to use paint to help separate these guys as marked by Khorne. The first step to differentiating them was to give them a brighter bronze base than my other figures. This bronze still got the same patina wash as the regular troops, but I think starting from a brighter spot makes them that tiny bit shinier. I've also minimized the hazard striping, isolating it to the left shoulder pad. Because I kept the same amount of black on the weapons and armor plating, this lack of striping has the added effect of making the unit a little more dark and sinister as a whole.
I'm not 100% happy with the flat black, but all of my attempts to make it pop - red glazing, edge highlighting, patchwork of skulls - only made the weapons look worse. I'll let the ideas percolate a bit and see if I come up with something else. If I do, great! If I don't... these guys are considered [i]done[/i].
Now, if you'll excuse me, I need to go sculpt some Dreadball turtles.

WHAT WAS IT THEN?
In May of 2010 I was riding a painting high from all the classes I took at Adepticon. One of my favorites was taught by James Wappel and his wife, who were among the nicest people I've ever met. They were enthusiastic and encouraging to all of our efforts, even though our marble and tile bases were like finger paintings compared to their work. Having recently purchased a McMourning crew during the initial Malifaux hype, I saw a happy convergence of newfound knowledge with desire to paint - put the mortician and his crew on tiled morgue bases!
I purchased some clay, a craft pasta machine for flattening it out, and a scribing tool for making the tiles. With the right tools, crafting the tiles was quick and easy. The hardest part was digging a hole in McMourning's base and crafting a making a convincing drain cover from plasticard. Painting the tiles was also pretty quick, as I did it before I applied the figures.
With the figures, I tried several new-to-me techniques. The first of which was painting white. I'm still not great at it, but the clothing on McMourning, Sebastian and the nurses came out better than I had any right to expect at the time.


This is also the first time I tried focused washes designed to do more than just make areas darker. I purposefully used purple and blue washes on the resurrected dogs and flesh construct to try and simulate pooled, deoxygenated blood. I think it worked particularly well on the pug. The chihuahua got markings to match my wife's own yappy-dog, Chili.

The flesh construct was a failure of the same washing technique. Using the same blue/purple washes over pale flesh tone didn't look re-animated dead, or even sickly, it just looked bad. I refused to strip the model, so tried to cover it up with some pale blues. It doesn't work, as it's poorly executed and you can see bits of the original flesh through it, but it does look better than it had.

WHAT DID I LEARN?
I learned to push myself and my painting, and that it's okay to miss the mark as long as you learn and improve on where you were before. At the time I painted them, these were the level-best I'd ever done and I was pretty proud of 'em. Not only because it was the first field-able "army" I ever finished, but because I think I carried out a well-developed, cohesive color scheme that identifies the individuals as part of a whole.

WHERE ARE THEY NOW?
Like most of my small-batch, painted miniatures, they're on the display shelf in my room. I never did get to field them. Malifaux was a flash-in-the-pan locally and while I was busy painting them, the gaming group had found the "most broken" combos and dismissed the game.
I'm looking forward to checking out Malifaux 2.0, and perhaps getting them to the table then. If not, I'll always have fun looking at this little guy...

Iron Warband Bases: all 8 units worth
The two 60mm bases are for my Chaos Dreads (Helbrutes). The top row is for my Chosen unit. The two below that are for each breaching squad. The two big blocks at the bottom are for the identical CSM squads, while the bases between them are for the Havoc squad that "leads" them.
Spent the last few hobby sessions partially as a break from painting armor, partially as a procrastination tactic on some Dreadball conversion work I seem to have lost my sculpting mojo for. Because of some failed starts in 2012, I had no clue how I was going to paint them, I only that I wanted to include green at the recommendation of one of the painting friends I look most up to. I decided on a mix warm and cold colors partially to experiment with something new and partially to help compliment the figures instead of compete with them. I realize the colors start to look a bit unnatural, but I still dig 'em anyway.


The base red-brown was airbrushed, then dry-brushed with a couple different shades of blue-green. The metals were glazed multiple times with various brownish reds and oranges 'till they looked rusty, and the rocks/concrete/wood got various green washes. I like the colors as a whole, and I like them with the test mini I kept holding up during painting. However, I'm a little apprehensive about how they'll compliment the army as a whole. We'll see when I start putting gluing the two together later this week.

I also managed to get all the bases completely stripped so I can burn through them all at once. Damon, one of my favoritest Adepti-Friends suggested green on the bases back in 2012, and I think I'm going to take it one step further by emphasizing a warm/cold contrast.
Ahnighito's Zigouilliers: bases in progress
I'm starting the dirt a deep red-brown and working up a couple different shades of blue-green. I couldn't get the colors in the pic to ring quite true enough, but they look a bit like oxidized dirt under moonlight. I still need to add detailing - dingy/rusty metals to the gears/girders, green-tinged grey to the rock and concrete, and neutral metals on the shell casings. It sounds odd, but I'm hoping the end result brightens the Iron Warriors a little and contrasts the minis in a way that helps the hazard stripes pop.
As usual, updates as progress warrants.
Polybolos Alpha (clickable)
They match Polybolos Beta almost perfectly. Makes me glad I took good notes a couple years ago when this project started!
Still need to do the freehand chapter insignia and finish the banner (saving those 'till all the infantry are complete), but I've gone ahead and completed the unit designations according to the original plan...
Polybolos Alpha | Ahnighito's Zigouilliers | Polybolos Beta
The idea behind these particular units is that all three are part of a larger whole. While the Zigouilliers are Veterans of the Long War, both Polybolos units are fresher recruits to the Iron Warriors cause, relegated to trench-line defense under Captain Ahnighito's command. Thus the Zigouilliers' full chevron is split on Alpha and Beta's pauldrons, each getting the left and right halves of the commanding unit's markings respectively.
I've also been making pretty good progress on the remaining infantry in the force...
Iron Palatine Gibeon w/ Breaching Squad Aerugo
Sikhote's Slaughterers
...getting each unit up to step 6 in the process. While it's been easiest to do the initial layers simultaneously up to this point, I'll be splitting 'em off from here on out. The plan is to finish one unit this month while devoting a significant portion of my hobby time to the projects I'm committed to for Adepticon 2014.
More updates as time and progress warrant!
Polybolos Alpha: January 16, 2014

Polybolos Alpha: January 19, 2014
Going through all the same steps as before, I'm reminded why I got burnt out on them in the first place. Doing this many steps on 11 man units is mind-numbing. But I'll keep chugging along. I intentionally chose this unit because it's not a showcase unit and I can use it to both re-familiarize myself with the models/painting techniques used, and get the largest-model-count unit I have remaining out of the way. It's only smaller units and cooler stuff from here!
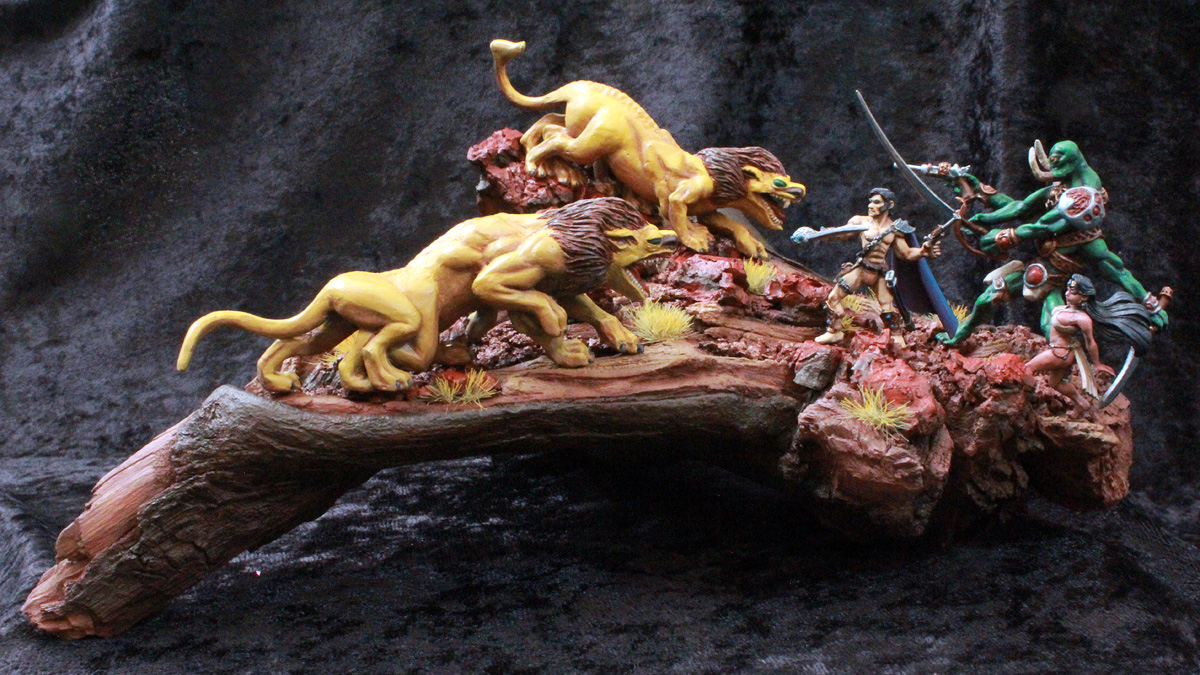
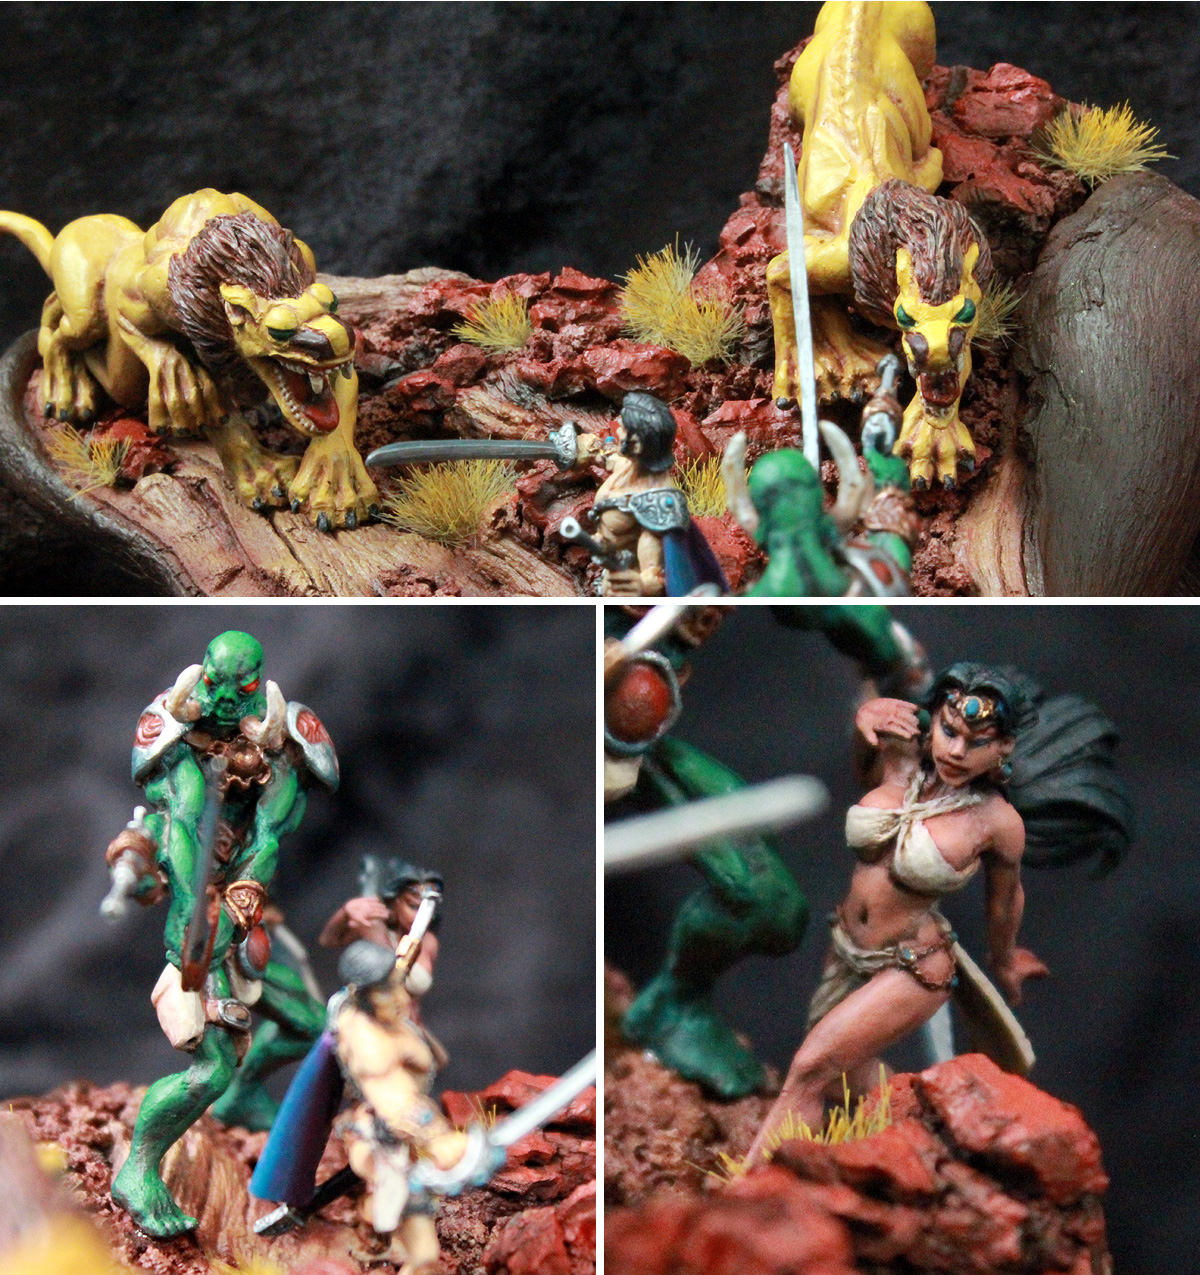
By the time I finished crafting the diorama there were only a couple weeks before Christmas. Partially because I was pressed for time, and partially because this was a one-off project, I don't have many "in-progress" shots of the painting. I do, however, have several photos of the finished project I was able to snap before boxing it up for Christmas.
All pics are clickable for larger versions.