Sunday, August 25, 2013

build: arena rex: designing an arena, pt. 2 - the stands

While an arena floor is what you need to play the game, it just looks like an empty patch of sand without some stands to back up the illusion. As much as I researched reality for my arena floor, I researched fantasy just as much when trying to figure out my arena's stands. There are some beautiful reference pictures of other folk's miniature arenas out there, but no matter where I turned, I kept coming back to pics from the Starz series Spartacus.


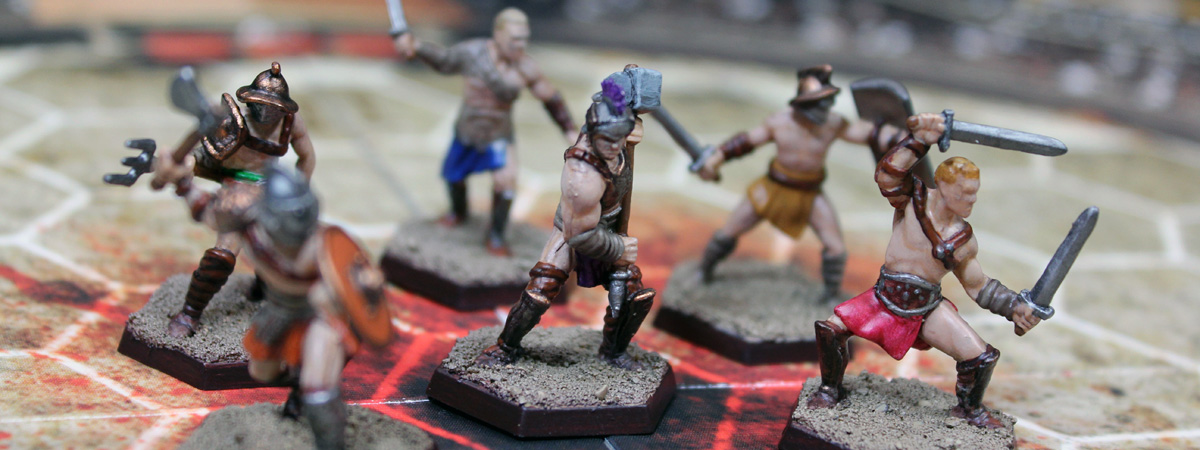
Capua's Arena: primary entrance, exterior, host's box

My design aesthetic will borrow heavily from these design cues. However, recreating Capua's arena in in full would pose several challenges - transport, ease of play, and build-time being chief amongst them. For this reason, I plan to draw a bit of inspiration from Arden Fell's arena. I really like that the missing wall breaks the typical "god's eye view" most wargames give us and invites us to get down onto the sand with out gladiators. It helps give the feeling that we aren't commanding the gladiators so much as being them, and I dig it hardcore.

However, Arden built his as one solid piece. While I applaud that for arena's kept in one location, I plan on transporting my arena quite a bit. To combat the bulkiness problem, and to fit the arena in my tiny Yaris, I plan to break my arena into four pieces - arena floor, "backdrop" stands, and two sets of side stands.


Arena Composition: floor, backdrop stands, side stands

The arena floor is the arena floor as detailed in "designing an arena, pt. 1." The "backdrop" stands will be the largest single piece, encompassing the host's box, multiple tiers of seating, and the shades seen so prominently in Gladiator and Spartacus. The side stands are likely to only have one tier of seating, and one of the sides will feature the "Emperor's Gate" entrance. Where the "front" bit of seating would go, I'll leave open for the reasons stated above.


Arena in 3D: incomplete sketch

I've not yet decided whether the walls between the gladiators and the spectators will be part of the stands, or build directly into the arena floor. The upside of attaching them to the stands is that the floor becomes a flat piece for transport. The upside of having them attached to the floor is that they're always there and can create the cursory illusion of an arena when time or space doesn't permit the stands. Either way, the aesthetic of the arena walls will draw heavily from the Spartacus photos above, as will the Host's box.


Arena Walls


Host's Box: cribbed almost entirely from the show

Depending on how the build goes, I've got a couple ideas that could give the backdrop and side stands some utility beyond elaborate decoration. Unfortunately, those came to me just today and I don't yet have them mapped out or drawn up. I'll let them marinate until I'm ready to tackle them head-on.

For now, it's time to run through a few games of Arena Rex and paint up another game's figures from the backlog.

Saturday, August 24, 2013

build: arena rex: printable test arena

As promised, here's some pictures of the printed arena floor I'll be using for the Arena Rex beta test.


Test Arena: 1/2 the size of a regular arena, all the fun!

Just for these photos, I laid out the arena with three columns on either side, two braziers, three regular pits, one animal pit and a dais in the middle. I may need to come up with a simple way to lock the modular terrain in place while play-testing, but other than that, I think it'll work great for giving the rules a try.


Blood Brothers: what I'm hoping will be my "good guy" team


Ludus Magnus: the faceless "bad guys" I hope to acquire and paint

At half-size, I was able to print up the arena, terrain counters and Red Republic's figures for less than $5. Not too shabby. Plus, after putting the figures and chits in ziploc bags, the figures, rules and terrain all fit nicely in an easy-to-transport school folder. If only the dice and tape measure would fit too...

If anyone is interested in printing the arena or terrain, here are the PDF files I used. If you want full-scale, just have your favorite printer blow it up. All the art is based on vectors, so it should scale nicely.

Arena Floor - for Legal paper (11"x17")
Arena Obstacles - for Letter paper (8.5" x 11")

Thursday, August 22, 2013

build: arena rex: designing an arena, pt.1 - the arena floor

A few months ago, when the Arena Rex Kickstarter was going strong, I pledged that if my friends jumped in I'd build us an arena to play in. Two of 'em jumped in, and I've been marinating on the build ever since.

My primary design goal was to balance modularity of the arena's traps and obstacles while having legitimate depth to any pit traps. After a few less-than-enthusing starts, I did a bit of internet research on the actual architecture and techniques used to make traps and animal pits in ancient Roman amphitheaters. Turns out most of the pits, animals, and other tricksy stuff were kept in a systematically designed underground labyrinth known as a hypogeum.


Amphitheater of Italica | Amphitheater of Capua

Using the two amphitheaters shown above as inspiration, I've combined elements to design a hypogeum of my own.


Hypogeum

There's a central staging/animal control area connected to an under-arena circuit by a lengthwise passageway. As you'll see in later pictures, a large chunk of this will be covered. Because of this, I plan to keep detailing simple - mostly dry brushed rock walls and passageways. The columns in the central staging area will get some extra attention, as they're a decidedly structural component. Here's why...


Amphitheater Floor: contiguous w/ holes

The arena floor will be a layer of wood (popsicle sticks or balsa) and sand over the hypogeum with regularly placed 2.5" and 3" square holes. As you can see, there's still dark brown from the hypogeum layer showing through every hole. The idea is that the "drop-in terrain" will rest on these areas, allowing for obstacles flush with the top layer of sand. The next couple pictures should help explain.


Hypogeum + Arena Floor: cross-section


Pit Trap: essentially a square donut

As you can see, the square would drop into one of the holes of the arena floor, resting on the hypogeum substructure, but also hanging a little over the tunnels. Terrain that sits above ground level (columns, crates, dais, etc) will be a snap, just make a square that lies flush and place the terrain on top. I've got ideas for at least two more terrain pieces that would take advantage of the passageways' depth.


Animal Cage & Brazier: both have components below ground level

Hopefully that helps my intentions make more sense. Theoretically, a completed arena with some drop-in columns, pits and an animal cage might look something like this:


Arena Floor: w/ modular terrain

The arena floor as designed is 33"x22". For the Arena Rex playtest, I plan to print up the above design at 1/2 scale with varying terrain squares I can drop on top of the map. (When playing, I'll scale the movement distances and ranges accordingly.) If the dimensions and spacing work well with the playtest, great! If not, it's easy enough to tweak the design in Illustrator 'till something works. The implementation of the "drop-in" terrain concept should work regardless of arena layout.

Sometime this weekend, I'll try to post up pics of the printed arena as well as my ideas for the amphitheater itself.

Monday, August 19, 2013

paint: spartacus

So I've been playing Spartacus: A Game of Blood and Treachery since it came out last year. It's a great little game with a nice balance between player cooperation and player betrayal. While the detail on the gladiator figures that come with the box are a bit soft on detail, I've been planning to paint them for quite some time. With recent plans to organize my hobby life for increased output, and since I finally got to play with the expansion a couple weekends ago, I figured now was as good a time as any.

I knocked the paint jobs out in a day, but it took me several more days before I got around to basing and shellacking 'em with protective varnish. I cleaned the mold lines a bit, but didn't feel like fighting the malleable plastic was worth it for figures that are only 1/3 of the game.

I'm rather pleased considering they're quick-and-dirty paint jobs on less-than perfect figures. They'll definitely add more than detract from our next game.

Sunday, August 18, 2013

paint: saga: jomsvikings

Fresh off a tournament victory, I tasked myself with getting my Jomsvikings 100% completed... and now they are!

A consistent problem I've had when painting armies is that I tend to overdo the number of steps, colors and layers to the point that I get burned out before I finish. Starting with my Rammers for Dreadball, I've been trying to simplify my process so that I can find a happy medium between time spent and aesthetic quality, and ultimately get more of these figures to the table top. With the Jomsvikings, I think I've got a winning combination.

So here they are, in all their "table-top quality" glory.


Jomsvikings Leadership: Jarl Olaf "Two Axe" and his sons, Sven and Ragnar

Every good warband needs someone to lead it, and these Joms are lead by Olaf "Two Axe", an old, grizzled warrior who stalks the battlefield more than strides it. He's flanked by his two sons, Sven and Ragnar, who lead his two units of Jomsviking while following in their father's footsteps by dual-wielding axes.


Leader's Shields: Raven, Valknut, Raven

When I first got into SAGA, I did much internet research and even read a couple physical texts about Vikings and the Viking age. While details on the Joms aren't concrete, there is some evidence that they were a Cult of Odin. I've chosen to reflect this in the leader's shields, giving Olaf a Valknut, which is often claimed as a symbol of Odin. Each of his sons' shields has a raven, symbolizing their role as Olaf's eyes and ears, much like Odin's ravens, Huginn and Muninn.


Sven's Jomsvikings: Hearthguard x6


Ragnar's Jomsvikings: Hearthguard x6

As the Hearthguard of a Jomsviking force, I wanted the Jomsvikings to stand out and look a bit more elite. Naturally they got the chain mail clad torsos, but I gave them a red and black color scheme with black-and-white shields to help set them apart. After all, these are the most experienced mercenaries in a mercenary warband, I figure they've spent some coin to get "finer" duds.


Dreng Unit 1: Warriors x8


Dreng Unit 2: Warriors x8


Dreng Unit 3: Warriors w/ Dane axes x8

The Dreng are the Warriors in a Jomsvikings force, but are younger and less experienced. I gave them a mix of earthy colors to keep them simpler, but gave them grey-and-white shields to help tie them to the force as a whole. I think the unified shields and basing work pretty well to make them a cohesive battle group...


The Jomsvikings of Olaf "Two Axe"

It's funny, the shields were the part I was dreading the most. I even looked into multiple decal solutions. But when push came to shove, I hadn't decided on decals and the shields were the only part of the figure left to do, so I buckled down and did 'em myself. Once I got going, I found the simple patterns and creative freedom quite enjoyable and cathartic. (Catching up on The Walking Dead probably helped a little too.) Here's all the patterns...


Jomsvikings Shields

Now that the Joms are finished, I'm not sure what SAGA force I might try next. I need to have a good sit down with all the rule books and battle boards and figure out what sounds the most fun... In the mean time, however, other projects await!

Saturday, August 17, 2013

miscellaneous: organizing the kanban way!

After listening to episode 82 of The Independent Characters and hearing Carl extoll the virtues of Kanban flow, the organization system piqued my interest.

However, when it comes to organization I'm a more tactile kinda guy. I enjoy the physical act of scratching items off a list. I don't get the same feeling when I delete an item off a grocery list on my iPhone. With that in mind, and several materials already on hand, I made this...

To solve the problem of sub-tasks, I've divided each column into stages, denoted by what color pin is holding the card. The column header also has pins as a key. For example, the Zombicide Runners, Walkers and Heroes are ready for the final stage of PREP, they're ready for priming. My sections are:

  • PREP - Wash, Assemble, Prime
  • 3-COLOR - Skin, Clothing, Weapons
  • DETAIL - Highlight, Shadow, F/X
  • BASE - Build, Paint, F/X
  • RECORD - Photo, Edit, Blog
  • COMPLETE - Admire, Beer!

Different games have different colored cards. Currently the purple cards are for SAGA, pink is Dreadball and blue is Infinity. The yellow cards are board games. I switch up the color of Sharpie to denote which cards are from different factions or board games - thus "Marauders" is written in green and "Robots" is written in black.

So far, it's working well. I only bothered to make cards for the stuff that's fresh in my mind and it's driven home just how many models I've got sitting around, doing nothing. None of my 40K, Flames of War, Privateer Press or Malifaux figures have cards yet! Hopefully, it'll be the motivation I need to stay on task and get some of these models ready to show off in the light of day.

Sunday, August 4, 2013

play: saga tournament: jomsvikings

Last week, with more than a little trepidations, I set off to Texas Toy Soldier for their July Saga Tournament. You see, I'd last played the game in February and had little-to-no clue what the last two expansions brought to the table. I also had spent the prior week or so trying to finish my vikings, but fell short of the mark. They were past a 3-color standard, but the bases texture was straight out of the sand box and the shields were all a flat brown.

My mind was soon put at ease. All the guys participating in the tournament were understanding regarding both my lack of recent play and not-quite-complete figures. Most were even highly complimentary of how they looked, despite their unfinished nature. A total of 7 players started the tournament, which was to be best of 3 rounds all played with the "Kill the Warlord" scenario. Winner by best win-loss ratio, total points killed as the tie-breaker.

GAME 1: Jomsvikings vs Scots - A fiercely bloody battle with some very wily Scots. This one came down to a single die roll. On the last turn we had a Warlord on Warlord clash where the Scot had to make 1 save on 3 dice to stay alive... and flubbed all three. I killed his Warlord despite a Scottish 20-19 point lead.

GAME 2: Jomsvikings vs Byzantines - First time playing against the Byzantines, and I didn't enjoy it. It wasn't my opponent's fault, he was a good guy and played his forces well, but between the inherently strong defense of a fast and shooty army with a mounted general able to cower behind a mass of troops, "Kill the Warlord" is a tough road to hoe with a foot-slogging, melee only army. Add in consistent denial of Wraith by my opponent, and I was a sitting duck. Byzantine win by points, 11-2.

GAME 2: Jomsvikings vs Pagan Rus - First time playing against these guys as well, and I've got to say I like 'em. Some incredibly nasty tricks up their sleeves led to the near annihilation of a warrior unit that got caught out in the cold. "You can only move 4 inches. Oh, and your unit that isn't within 6 inches of anybody is now max fatigue. Oh, and every unit on the board with a fatigue marker takes off that many models - the fatigue stays." is a nut-buster of a combo. Fortunately, I was able to use my battle board to deny the Rus some of their other shenanigans, and managed to pull away with a 26-14 point victory.

After the bodies were laid to rest in their foam trays, it was determined that three of us were tied for first with a 2-1 record. When the points were tallied... I somehow came in on top! Netted me a $20 store gift certificate for my efforts, which I'm still trying to figure out how to spend. I was pleasantly surprised with how well I did, despite the lack of experience, and am looking forward to getting in more games soon. The Jomsvikings will definitely be staying on the painting table 'till they're done.